HOW TO: Create a Bootable USB Flash Drive for Installation of Windows Server 2012

Andrew Hancock (VMware vExpert PRO / EE Fellow/British Beekeeper)![]() VMware and Virtualization Consultant
VMware and Virtualization Consultant
 VMware and Virtualization Consultant
CERTIFIED EXPERT
EE Fellow, MVE, Expert of the Year 2021,2017-11, Scribe 2016-2012, Author of the Year 2018-6,2013-2012 VMware vExpert Pro, vExpert 2022-2011
Published:
Browse All Articles > HOW TO: Create a Bootable USB Flash Drive for Installation of Windows Server 2012
With the announcement of Microsoft Windows Server 2012 release in a few days time, I thought I would write an article on HOW TO: Create a Bootable USB Flash Drive of Microsoft Windows Server 2012 I have seen many internet articles on how to create a bootable copy of Windows Server, that seem very long winded and involved. This is the "Andy-method", which is quick and easy, with free software provided by Microsoft.
This can help speed up a server installation, and does not require a blank DVD to be written with the DVD ISO that has been downloaded from Microsoft Technet or MSDN. The same procedure can be used for Windows 7 or Windows Server 2008 R2.
Prerequisites
Using an Internet browser of your choosing download the Windows 7 USB/DVD Download Tool from HERE. Although this software product is designed to work with Windows 7, I have also tested with Windows Server 2008 R2 and Windows Server 2012 to create a bootable USB flash drives of Windows Server 2008 R2 and 2012.
Double Click the Windows7-USB-DVD-tool.exe in your download folder and proceed to install the software product.
![Windows 7 USB DVD Download Tool icon]()
![Choose ISO file]() Select Next to continue,
Select Next to continue,
![ISO selected]()
![Choose media type]()
![Insert USB device]() Select Begin copying
Select Begin copying
![Formatting....]()
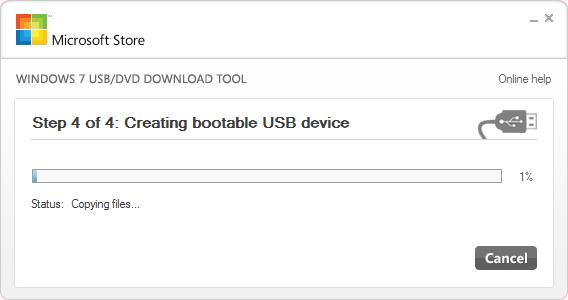
![Copying files...1%]()
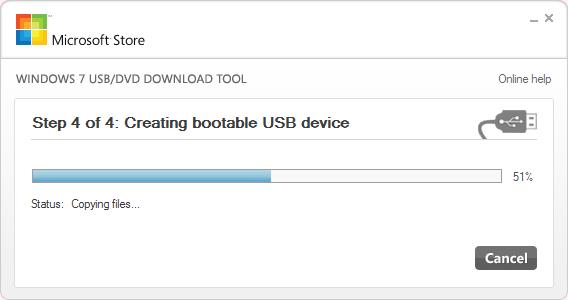
![Copying files...51%]()
![Copying files...99%]() The process takes approximately 5 minutes to complete for a 3.5GB ISO.
The process takes approximately 5 minutes to complete for a 3.5GB ISO.
![Status: Backup completed]()
Safely Remove the USB flash or thumb drive from your computer.
You have successfully created a Windows Server 2012 bootable usb flash drive to install your operating system.
******************************************************************************************************************************************************
Thank you for reading my article, please leave valuable feedback. If you liked my Windows Server 2012 article and would like to see more Articles from me, please click the Yes button near the: Was this article helpful? at the bottom of this article just below and to the right of this information. Thank You. Do not forget if you have a question about this article or another VMware, Virtualisation, Windows Server 2012 question, why not post a Question for Me and the other Experts Exchange Experts in the VMware, Virtualisation, Windows 2008 Zones. I look forward to hearing from you. - Andy
******************************************************************************************************************************************************
This can help speed up a server installation, and does not require a blank DVD to be written with the DVD ISO that has been downloaded from Microsoft Technet or MSDN. The same procedure can be used for Windows 7 or Windows Server 2008 R2.
Prerequisites
Windows 7 USB/DVD Download Tool
Microsoft Windows Server 2012 ISO
4GB USB Flash or Thumb Drive (minimum)
1. Download the Windows 7 USB/DVD Download Tool
Using an Internet browser of your choosing download the Windows 7 USB/DVD Download Tool from HERE. Although this software product is designed to work with Windows 7, I have also tested with Windows Server 2008 R2 and Windows Server 2012 to create a bootable USB flash drives of Windows Server 2008 R2 and 2012.
2. Install the Windows 7 USB/DVD Download Tool
Double Click the Windows7-USB-DVD-tool.exe in your download folder and proceed to install the software product.
3. Start the Windows 7 USB DVD Download Tool application
Start the Windows 7 USB DVD Download Tool application by double clicking the following icon on your Desktop
4. Choose the ISO file you have downloaded
The following screen will appear, browse to the location of the Windows Server 2012 ISO file you have downloaded from Microsoft.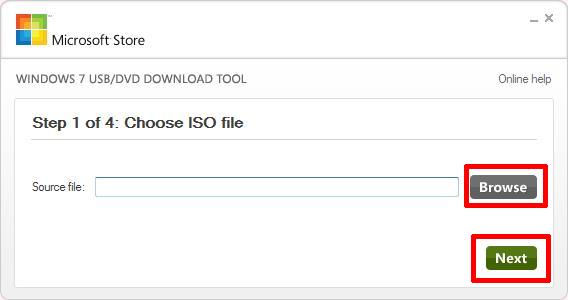 Select Next to continue,

5. Choose media type
Ensure the USB flash or thumb drive is connected to the computer and select USB device.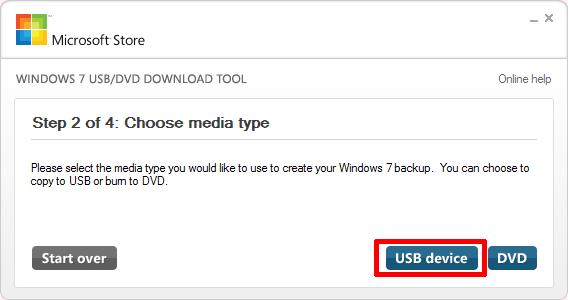
6. Insert USB flash or thumb drive
Select the USB flash or thumb drive you want to prepare as a bootable copy of Windows Server 2012. Please exercise caution when selecting the USB device, the device will be formatted, and all the information will be lost.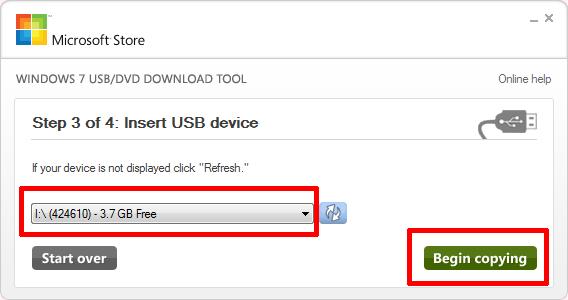 Select Begin copying
7. Creating bootable USB device
Sit back, grab a cup of coffee, whilst the USB flash or thumb drive is formatted, and the files are extracted from the ISO and copied to the flash drive.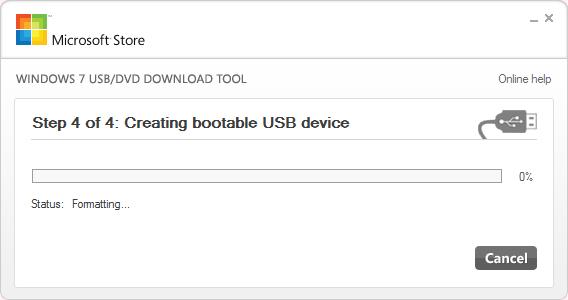
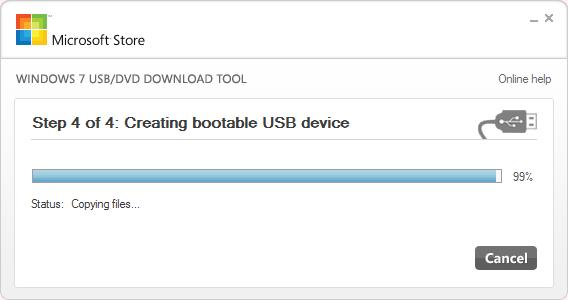 The process takes approximately 5 minutes to complete for a 3.5GB ISO.
8. Bootable USB device created successfully
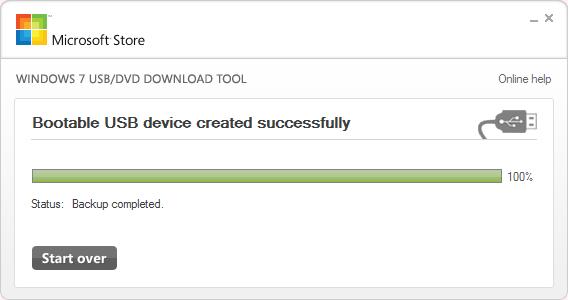
Safely Remove the USB flash or thumb drive from your computer.
You have successfully created a Windows Server 2012 bootable usb flash drive to install your operating system.
**************************
Thank you for reading my article, please leave valuable feedback. If you liked my Windows Server 2012 article and would like to see more Articles from me, please click the Yes button near the: Was this article helpful? at the bottom of this article just below and to the right of this information. Thank You. Do not forget if you have a question about this article or another VMware, Virtualisation, Windows Server 2012 question, why not post a Question for Me and the other Experts Exchange Experts in the VMware, Virtualisation, Windows 2008 Zones. I look forward to hearing from you. - Andy
**************************
EE Fellow, MVE, Expert of the Year 2021,2017-11, Scribe 2016-2012, Author of the Year 2018-6,2013-2012 VMware vExpert Pro, vExpert 2022-2011
Have a question about something in this article? You can receive help directly from the article author. Sign up for a free trial to get started.
Comments (13)
Author
Commented:Maybe the *.ISO from Microsoft has changed!?
Commented:
Don't know if I am allowed to reference a youtube video, but this method I have found best and works for both win7 and windows 8.1with no downloads required and definately works - this should also work for server 2012.
http://www.youtube.com/watch?v=nZVgInbhTAw
Commented:
I didn't try it yet so is it worth trying or it's a difficult stufff?
Author
Commented:Commented:
View More