Kodi (XBMC) - Advanced Configuration The Easy Way


Published:
Browse All Articles > Kodi (XBMC) - Advanced Configuration The Easy Way
You may or may not be familiar with Kodi the open source software media player and entertainment hub that can be installed on Linux, OSX, Windows, iOS, and Android. Kodi which started off as X-Box Media Center (XBMC) many years ago, has quickly become the go to application to play and view most videos, music, podcasts, and other digital media files from local and network storage media and the internet.
Note: I do not advocate the use of any software for the illegal downloading, viewing or listing of copyrighted materials. Copyright infringement is a serious crime with very sever consequences if caught and proven guilty.
One of the greatest aspects to Kodi is the fact that it is open source and that it has a huge community and support base; a loose estimate of 475,000 users are currently using Kodi with more than 4 million downloads that number is sure to be higher. You are not limited with standard features and settings with Kodi, developers, designers and enthusiasts have been poring hours and hours into ways to customize Kodi and make it do some truly incredible things. In fact almost any set-top-box that you purchase will come with Kodi pre-installed or will at least support Kodi and is used as a selling point in many cases.
What do you get by installing and using Kodi?
Short answer...access to all of your local media (music, video, audio, anything) as well as access to a huge number of online content providers. Most content providers will provide you access to Live TV channels or Live sports for a small fee, giving you the ability to pick and choose what you can watch. The best part about online sources is that you can treat them as you would a DVR, and watch your favorite shows anytime you like. All in 720, 1080, 2K, 4K and 3D for most content, 2K, 4K and 3D are still a growing area but you can easily find thousands of movies and TV shows.
Kodi connect to the internet and uses online databases to find and download your contents meta data and cover art as well. This is what pulls the whole look and feel of Kodi together. You simply point to your media and Kodi will organize your files, download the meta data and cover art and make it all accessible to you via a beautiful interface.
Kodi connect to the internet and uses online databases to find and download your contents meta data and cover art as well. This is what pulls the whole look and feel of Kodi together. You simply point to your media and Kodi will organize your files, download the meta data and cover art and make it all accessible to you via a beautiful interface.
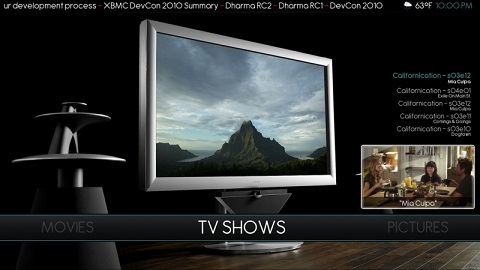
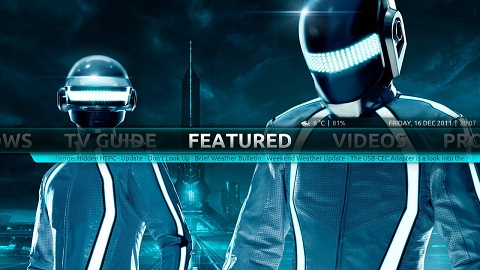
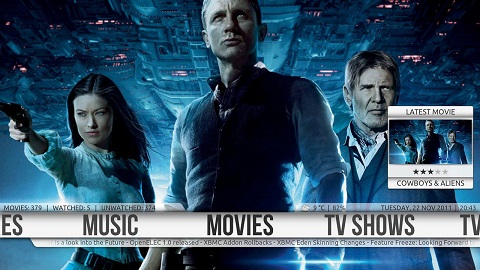
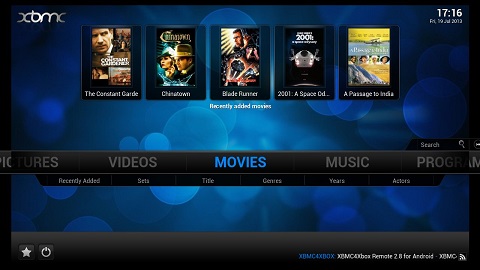
Here are just a few examples of the looks and feels you can have with Kodi:
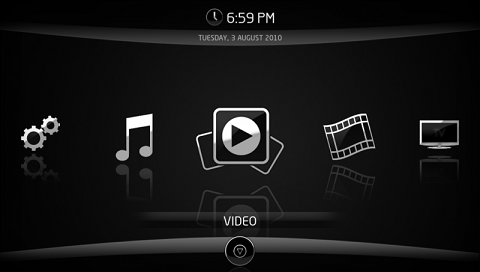
How to get the most out of your Kodi install without having to customize it yourself (great for beginners)
In this section I will cover a somewhat new feature to Kodi which uses the Total Installer from TotalXBMC to install customized community builds for Kodi. These builds allow you to take advantage of what some long time pros feel are the best aspects of the Kodi app. Using community builds for TotalXBMC allows you to install skins, add-ons (built in applications for Kodi), configurations and systems settings that maximize the user experience. This really allows new users to see what Kodi is capable of without forcing them to become experts themselves, and is also supported by a great community of experts.
Register for a Total Revolution forum account: http://totalxbmc.tv/new-forum/index.php?action=register (this will allow you to access and install all community builds)
To get started you will need to install Kodi on your system, to do so visit: http://kodi.tv/download
Once you have Kodi downloaded install and run the application, these procedures are different depending on your system and operating system. This article assumes you already know how to do this for your given system.
The following procedures are also covered in a YouTube video located here: https://www.youtube.com/watch?v=lqm8_2g5uRs
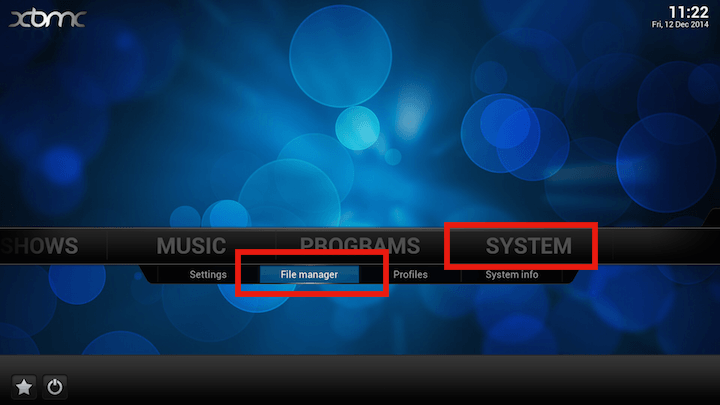
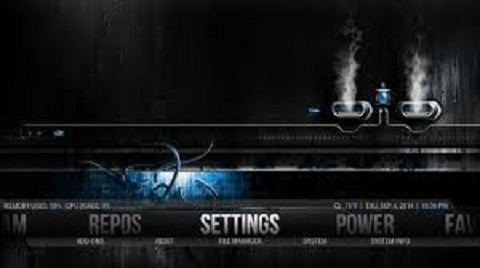
Once you have Kodi open you will see a rather empty home screen with a main navigation bar in the center of the screen. Using your keyboard preferably or mouse scroll to System, you will see a few sub-menus populate under the main menu, select the File Manger sub-menu.
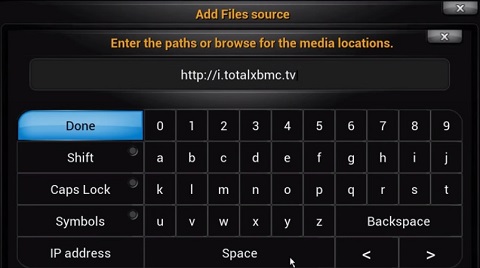
 Inside the File Manager you will have the option to add source locations for apps, add-ons, content and more. (Note: This is also where you would add your local network content location) You will need to add a new source to link to the Noobsandnerds website, Kodi will then use that source to access the tools and add-on located there. To do this click on the Add Source option at the bottom of the list on the left of the screen. When prompted for input type: (UPDATE: http://noobsandnerds.com/p
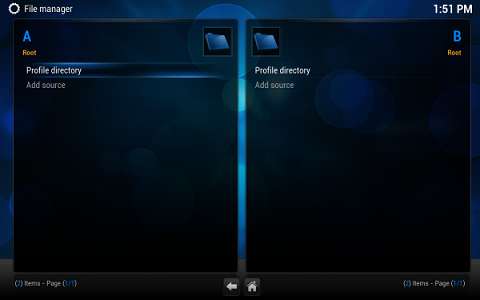
 You should see the new source show up in the list, click on it to ensure you typed the URL correctly. If all is correct you should see a folder open displaying the webcontent of the noobsandnerds site. Now that we have the source loaded we need to install the (UPDATE: Community Portal) addon that will allow you to install Community Builds.
To install the Total Installer add-on we need to exit out of the File Manager by clicking Back, Backspace or Exit depending on your system. Once you are back at the Main navigation screen you want to select System from the main menu (not a sub-mentu). On the System page you will have a list of options on the left, scroll down to Add-Ons and select it, on the next list of options scroll down and select Install From ZIP.
This will open a new window where you will need to choose the source for the new add-on you wish to install. You should see the noobsandnerds source listed, select it. Yet another window will open listing the content of the noobsandnerds webfolder. Select repository.noobsandnerds.z
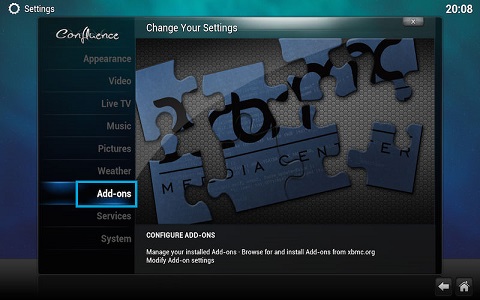
Exit our of the install area, back to the Main navigation menu and select System>Add-Ons>Enabled Add-ons from here you may need to go to Program Add-ons or select the Noobsandnerds repository, and then Community Portal. This will launch the Community Portal add-on. On first run you will be asked to enter your forum account information. If a settings window is not automatically opened, exit the add-on, highlight it again in the menu and click the "C" key or press your Menu button depending on your system then select Add-on Settings. You can enter your forum account information here, then restart the add-on.
You will then be presented with options for the type of build you would like to install, then with a list of builds that meet your specified criterion. You will also be asked if you would like to setup a backup location for your current build. This is optional or you can just select any folder on your system, once it is set Community Builds will allow you to install new builds.
For information on the different builds and what each builds has to offer, or to see what a build looks and feels like prior to installation you can view information on each using the TR Community Builds Portal located here: http://www.totalxbmc.tv/communitybuilds/
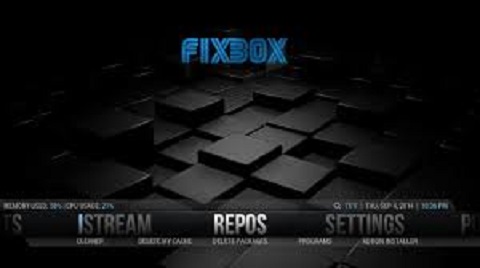
I personally like the Fixbox build, it is visually very pleasing and has a lot to offer with pre-installed add-ons for Movies, TV shows, Live TV, Live Sports, Radio and more.
Link to FIXBOX build: http://www.totalxbmc.tv/communitybuilds/show/7/
Here are a few screenshot of FIXBOX
 I hope this encourages you to dig around and play with Kodi and see what all it has to offer. As I mentioned there is a huge community out there to support this application and you can find resources all over, if you are curious or have questions you can ask here, or try one of the below support communities.
~:TLH:~
Support Communities:
http://kodi.wiki/
http://forum.kodi.tv/
https://www.youtube.com/user/XBMChelpguide
https://www.youtube.com/channel/UC9kWsdqyUei0Hv28cbxaZlQ
http://www.totalxbmc.tv/newsite/
http://www.totalxbmc.tv/tutorials
http://www.tvaddons.ag/
Have a question about something in this article? You can receive help directly from the article author. Sign up for a free trial to get started.
Comments (3)
Commented:
Author
Commented:Unfortunately I do not have that hardware to see if I can duplicate the issue, however, I can provide you the steps that are most commonly used to correct any major issues. This just happens to be a reinstallation of the configuration from a fresh start of Kodi.
This can be don using the new Community Portal addon by going to Maintenance and selecting clean/wipe options, then fresh start. You will be prompted to backup your setup before everything is erased.
From there you can simply re-add the new http://noobsandnerds.com/portal source, and from there installing the Community Portal addon again. Once that is done you will need to again go in and configure your user name and password to the NoobsAndNerds website. Then go back into the addon and select Install content>Community Builds.
You will be taken to the Community Builds portal and be able to select a build to install from there. If all works as it should PrimeWire (1channel) should be installed by default in most builds.
Hope this helps.
~:TLH:~
Commented: