

Browse All Articles > Connect to SAP R/3 and call custom FM from MS Excel
This article descibes how to create a connection between Excel and SAP and how to move data from Excel to SAP or the other way around.
Introduction
As a SAP consultant I do get lots of questions about master data and how to integrate excel with SAP. SAP had a very limited support to MS Office tools, but in the meantime the integration of MS Office in SAP is very good. But how about the other way around? On the Internet there are lots of specific articles about the integration of SAP in MS Office Excel topic. Most of the topics are about the connectivity/ logon between MS Office Excel and SAP and calling standard BAPI’s or FM’s from MS Office Excel. Although, a good working example is hard to find or the information is outdated. The most popular article(s) on this subject is how to call FM “RFC_READ_TABLE” or “TABLE_ENTRIES_GET_VIA_RFC
The purpose of this post is to give a short demonstration on how:
- create a custom FM to extract data from multiple tables in SAP;
- create a remote enabled FM;
- create IMPORT and TABLES parameters as per requirement from MS Office Excel;
- write logic to display material number and its description based on input from the MS Office Excel file;
- Save and activate the FM;
- to connect from MS Office Excel to SAP R/3, without using references in VBA;
- create a MS Office Excel file for user input and input data for the material master;
- define output cells in MS Office Excel;
- Apply VBA code to connect with SAP R/3;
- Read input data for the material master from MS Office Excel;
- to display the data from SAP into MS Office Excel.
- fetch data from SAP R/3;
- display output in MS Office Excel.
Create custom FM to extract data
In this part the creation of a custom FM will be explained. The example will demonstrate how to create a remote enabled FM, parameters, extract data from SAP tables “MARA” and “MAKT” and save and active the custom FM. Of course, I do not need MARA to extract data from MAKT, but I just want to show you an example on how to extract data from two tables in SAP.
Create a remote enabled FM
To create a remote enabled FM you need to be logged into SAP as a developer.
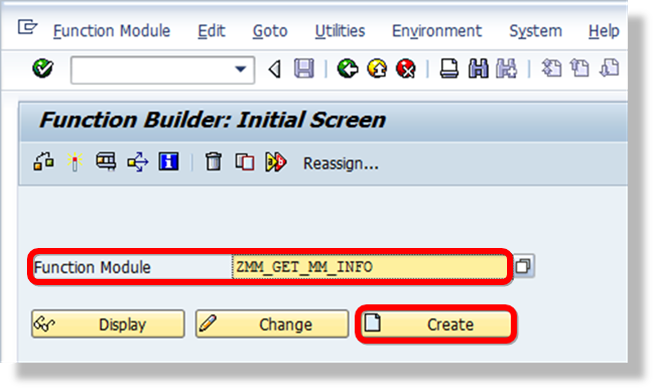
Open transaction SE37 to open the Function Builder. Enter a new name for the custom FM. In this example “ZMM_GET_MM_INFO” will be used as name. Then click on “Create”.
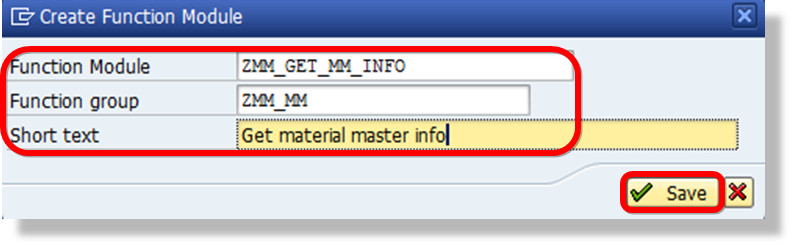
A pop-up will be displayed, containing three fields; Function Module, Function group, Short text and click “Save”.
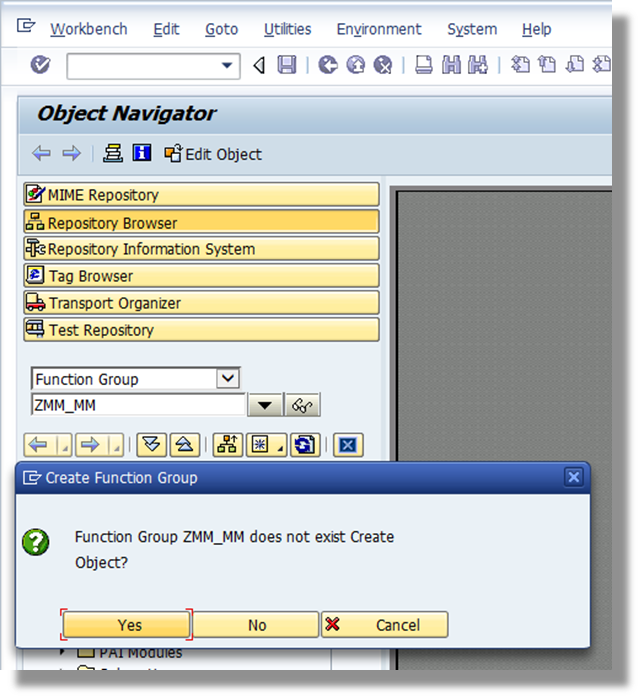
 If you do get the error “Function group XXXX does not exist”, then create a function group with transaction SE80. In this transaction select “Function Group” in the drop down, enter a name and press Enter.
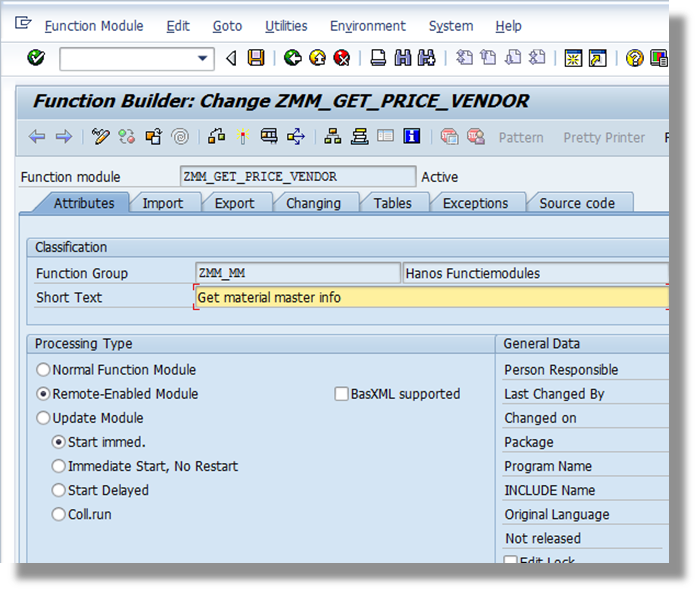
Make sure “Remote-Enabled Module” is selected after creating the function module, this can be found under tab “Attributes”.
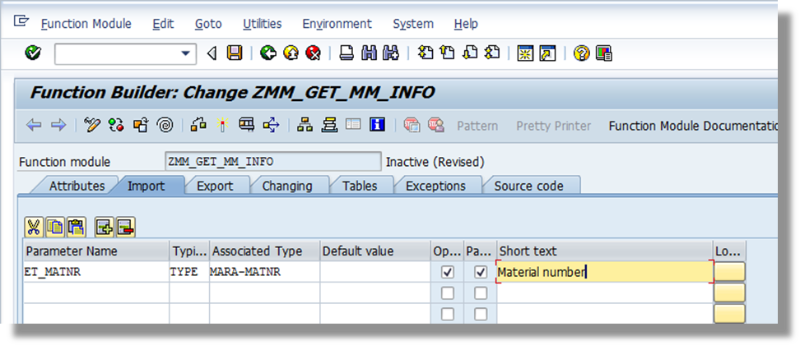
Create Import parameters
In this case the material number will be the input (from Excel), so the information can be extracted from SAP. Therefor it is necessary to create import parameters, this can be done in tab “Import”. The information should be extracted from table MARA, so the associated type in this example is MARA-MATNR.
Create table parameters and structure
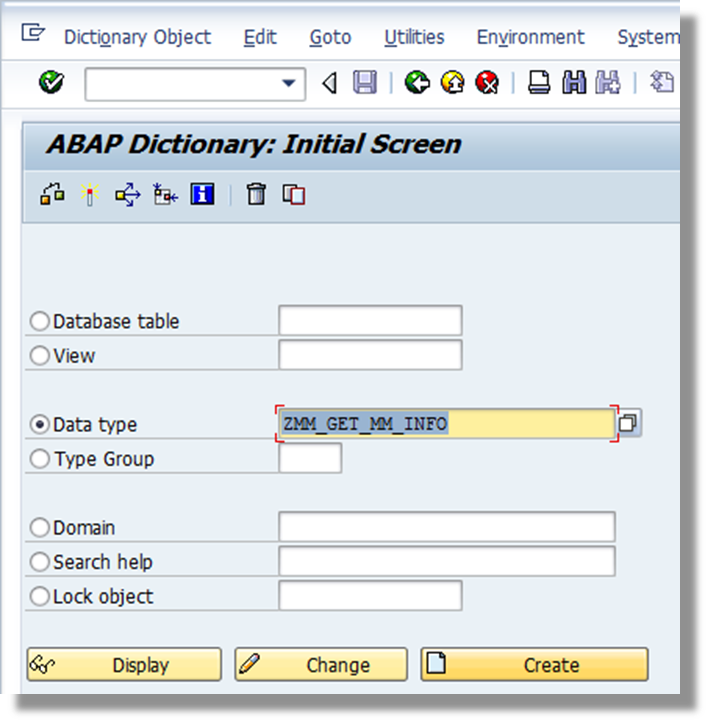
The next thing would be adding the table parameters, but before entering data in this tab it is necessary to create a structure for the output. This can be done in SE11. Enter the name of the structure in field “Data type” and click on “create”. Then select “structure” in the next screen.

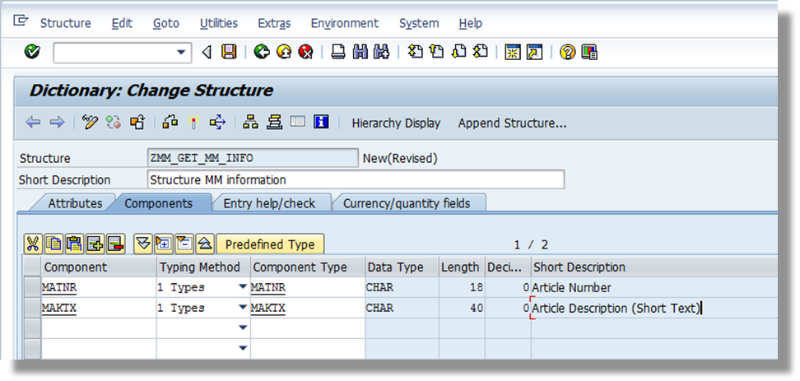
The structure in this example will be easy. There is only need for two fields, MATNR and MAKTX (material number and material description). The structure will look like the figure below. Add the fields and save the structure.
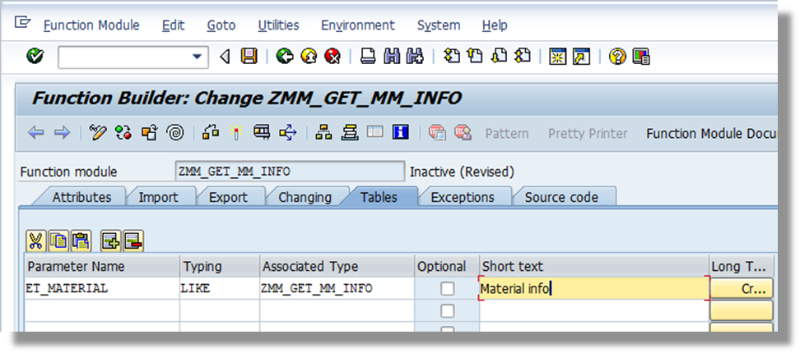
Now, the table parameters can be added in the function module. This can be seen as the output, the data will be imported to the function module and then displayed in Excel. Save the function module and do not forget to activate it. This can be done with button

Add ABAP to FM
Everything is set now and the ABAP code can be added to the function module. Click on tab “Source code” to enter the code.
The code needs to select two fields from a JOIN of tables MARA and MAKT based on the input (ET_MATNR) from excel and return the results in table ET_MATERIAL. The code would look like:

Here is the code:
********************************************************************
                      FUNCTION ZMM_GET_MM_INFO.
                      *"----------------------------------------------------------------------
                      *"*"Local Interface:
                      *" IMPORTING
                      *" VALUE(ET_MATNR) TYPE MARA-MATNR OPTIONAL
                      *" TABLES
                      *" ET_MATERIAL STRUCTURE ZMM_GET_MM_INFO
                      *"----------------------------------------------------------------------

                      IF NOT ET_MATNR IS INITIAL.

                      SELECT MARA~MATNR MAKT~MAKTX
                      INTO TABLE ET_MATERIAL
                      FROM MARA
                      INNER JOIN MAKT
                      ON MARA~MATNR = MAKT~MATNR
                      WHERE MARA~MATNR = ET_MATNR.

                      ENDIF.

                      ENDFUNCTION.
********************************************************************We are done in SAP, so let’s continue in Excel.
Setup and add code to Excel
As an example two columns have been added to the excel file. One will be the input for SAP (matnr) and second column will return the results from SAP. Make sure the developer tab is visible, if not then please follow the instructions of the following Microsoft website :
https://msdn.microsoft.com
Click on the developer tab and click on “Insert”.

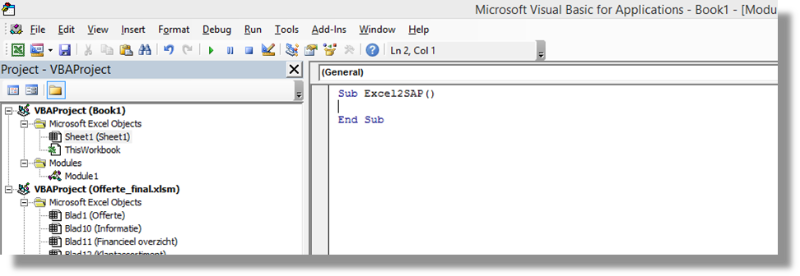
Select the first form control “Button” and draw a button on the excel sheet. Enter a name or use the default name and click “new”. In this example I've used "Excel2SAP" as name. After the click Visual basic editor will open automatically and you can start coding.
 In this case the code in Excel would look something like this (explanation also included in the commented area’s):
'*******************************************
                      Sub Excel2SAP()
                      '**********************************************
                      'Declare variables
                      '**********************************************
                      Dim R3, MyFunc, App As Object
                      Dim Result As Boolean
                      '**********************************************'
                      Make connection from Excel to SAP
                      '**********************************************
                      Set R3 = CreateObject("SAP.Functions")
                      R3.Connection.ApplicationServer = "10.x.x.x"
                      R3.Connection.System = "ECD"
                      R3.Connection.SystemNumber = "00"
                      R3.Connection.Client = "200"
                      R3.Connection.User = "TestUser"
                      R3.Connection.Password = "TestPass"
                      R3.Connection.Language = "EN"
                      R3.Connection.UseSAPLogonIni = False
                      '**********************************************
                      'If connection fails, then exit. No error or warning.
                      '**********************************************
                      If R3.Connection.Logon(0, False) <> True Then
                      Exit Sub
                      End If
                      '*****************************************************
                      'Set FM ZMM_GET_MM_INFO
                      '*****************************************************
                      Set MyFunc = R3.Add("ZMM_GET_MM_INFO")
                      '*****************************************************
                      'Declare variables (could also be added above) and set Parameters
                      '*****************************************************
                      Dim oParam1 As Object
                      Dim oOutput As Object
                      Set oParam1 = MyFunc.exports("ET_MATNR")
                      Set oOutput = MyFunc.Tables("ET_MATERIAL")
                      '*****************************************************
                      'Make sure the input cell is formatted as text. This is important for
                      'leading zero’s. If no leading zero’s, then add them.
                      '*****************************************************
                      If Len(Range("A2").Value) < 18 Then
                      leadingzeros = 18 - Len(Range("A2").Value)
                      For y = 1 To leadingzeros
                      Range("A2").Value = "0" & Range("A2").Value & ""
                      Next y
                      End If
                      '*****************************************************
                      'Input (ET_MATNR)
                      '*****************************************************
                      oParam1.Value = Range("A2").Value
                      '*****************************************************
                      'Call FM
                      '*****************************************************
                      Result = MyFunc.Call
                      '*****************************************************
                      'Check result and add to sheet.
                      '*****************************************************
                      If Result = True Then
                      Cells(2, 2).Value = oOutput.Value(1, "MAKTX")
                      Else
                      MsgBox MyFunc.EXCEPTION
                      R3.Connection.Logoff
                      Exit Sub
                      End If
                      '*******************************************
                      'Logoff
                      '*******************************************
                      R3.Connection.Logoff
                      If Result <> True Then
                      MsgBox (EXCEPTION)
                      Exit Sub
                      End If
                      End Sub
'*******************************************It is done, now the function module can be tested in Excel. Let’s see the results:
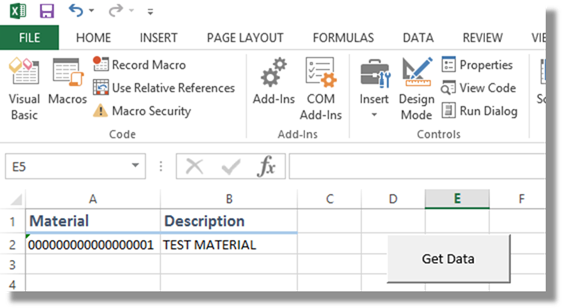
I’ve renamed my button to “Get Data”. Press on the button. A pop-up will show up, if the user data is empty in the code then you will have to add the user/password etc manually.
Click OK and see the results.
I'll hope this will help you out and you have enjoyed the read. I'll wish you success and luck making great tool with MS Office and SAP. If you have any comments or remarks, please do not hesitate to contact me.
Have a question about something in this article? You can receive help directly from the article author. Sign up for a free trial to get started.
Comments (0)