HOW TO: Install VMware Tools for Windows on a VMware Windows virtual machine on a VMware vSphere Hypervisor 7.0 (ESXi 7.0) Host Server

Andrew Hancock (VMware vExpert PRO / EE Fellow/British Beekeeper)![]() VMware and Virtualization Consultant
VMware and Virtualization Consultant
 VMware and Virtualization Consultant
CERTIFIED EXPERT
EE Fellow, MVE, Expert of the Year 2021,2017-11, Scribe 2016-2012, Author of the Year 2018-6,2013-2012 VMware vExpert Pro, vExpert 2022-2011
Published:
Edited by: Andrew Leniart
Browse All Articles > HOW TO: Install VMware Tools for Windows on a VMware Windows virtual machine on a VMware vSphere Hypervisor 7.0 (ESXi 7.0) Host Ser…
In this article, I will show you HOW TO: Install VMware Tools for Windows on a VMware Windows virtual machine on a VMware vSphere Hypervisor 7.0 (ESXi 7.0) Host Server, using the VMware Host Client. The virtual machine has Windows Server 2019 installed.
In my previous Experts Exchange Articles, most have featured Basic and Intermediate VMware and Virtualisation Topics.
If you would like to read my Basic VMware articles, they are listed at the end of this article for your convenience.
In this series of basic VMware articles for the Novice, I'll be showing you the basic VMware skills required to install, configure and deploy virtual machines using VMware's FREE VMware vSphere Hypervisor (ESXi).
In this article we will show you HOW TO: Install VMware Tools for Windows on a VMware Windows virtual machine on a VMware vSphere Hypervisor 7.0 (ESXi 7.0) Host Server. This procedure can be followed to install VMware Tools on any Microsoft Windows operating system Virtual Machines provided they are supported by the version of VMware vSphere. You may want to consult the VMware Hardware Compatibility Lists or HCL, see here to check your operating system is compatible with VMware vSphere.
What is VMware Tools?
VMware Tools are a suite of utilities that enhances the performance of the virtual machine's guest operating system and improves the management of the virtual machine. Installing the VMware Tools package will greatly enhance graphics and mouse performance in your virtual machine. Without VMware Tools installed in your guest operating system, guest performance lacks important functionality.
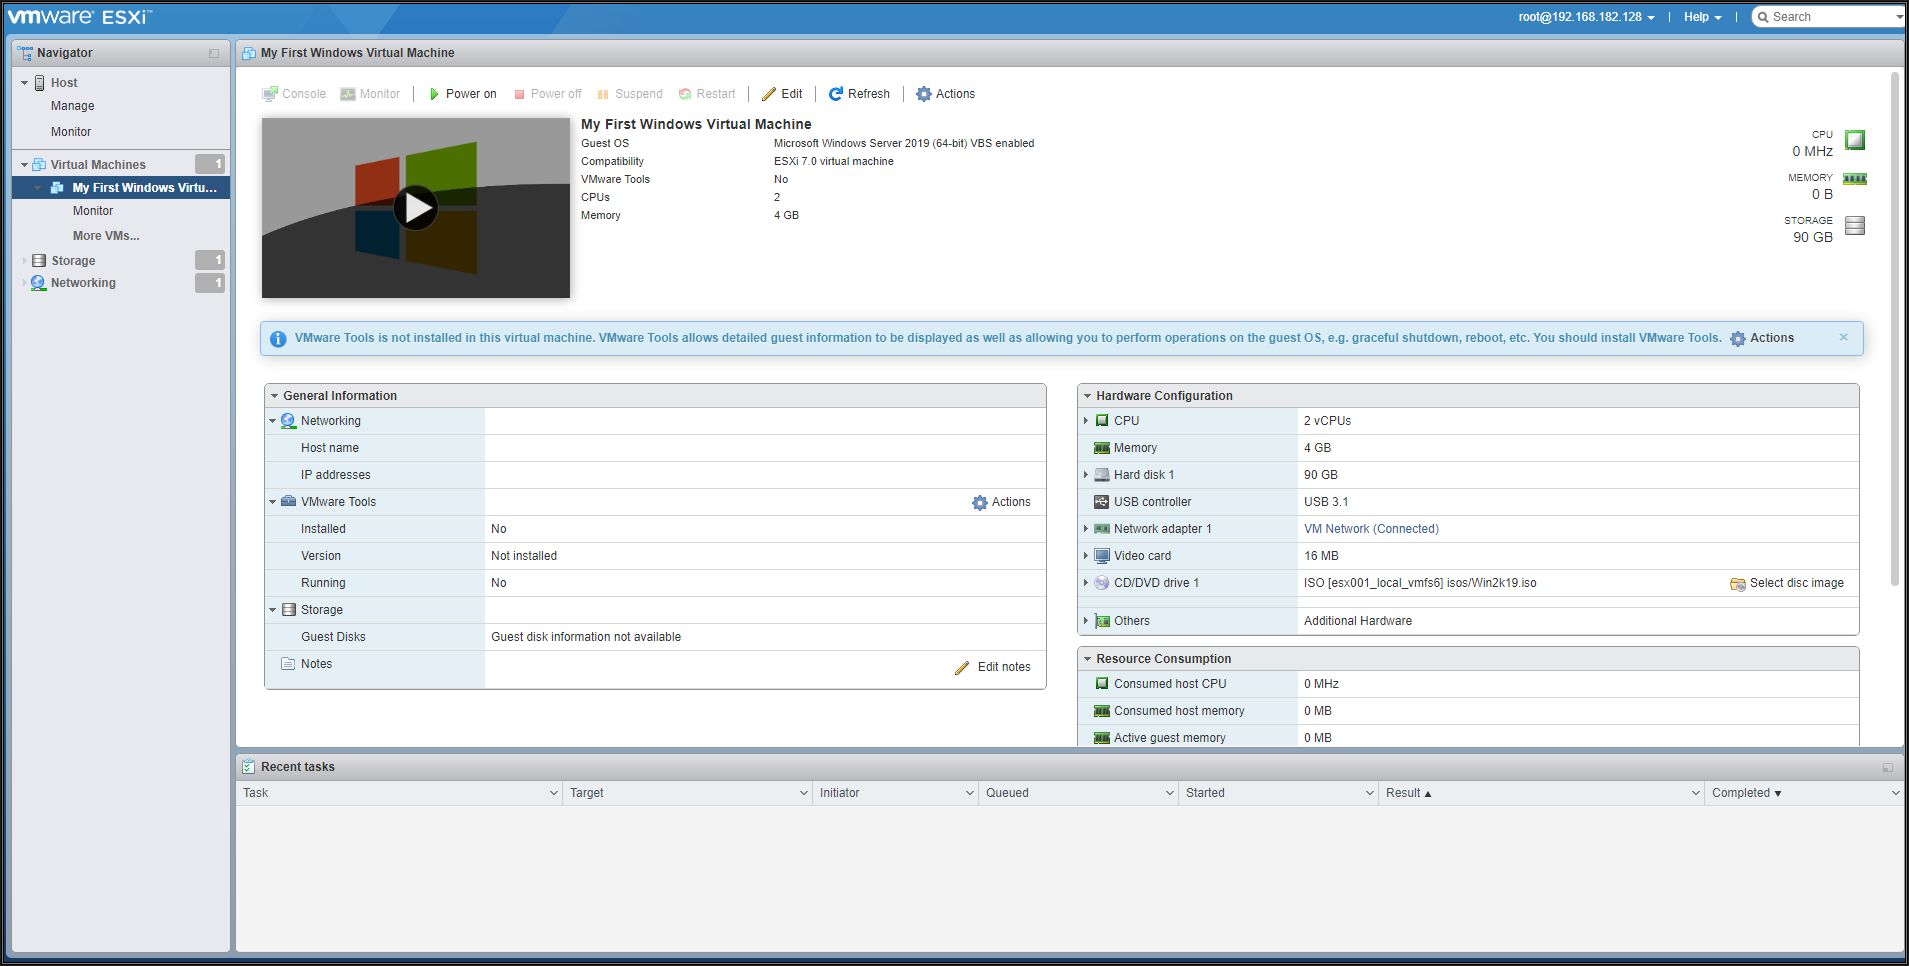
You can check if you have VMware Tools installed by checking the Summary of your virtual machine using the VMware Host Client if using VMware vSphere 6.7 or 7.0. If VMware Tools is installed VMware Tools will read VMware Tools version is compliant. (in previous versions it stated OK) , an IP Address and DNS hostname will appear in the Summary page. If VMware Tools is not installed, it will state No, and Not installed. VMware Tools is not optional and should be installed with all virtual machines.


Please refer to my EE article on Part 2: HOW TO: Connect to the VMware vSphere Hypervisor 7.0 (ESXi 7.0) using the vSphere (HTML5 Web) Host Client 7.0
Click the icon of the virtual machine.

Click the virtual machine.
Check the summary information for the virtual machine.
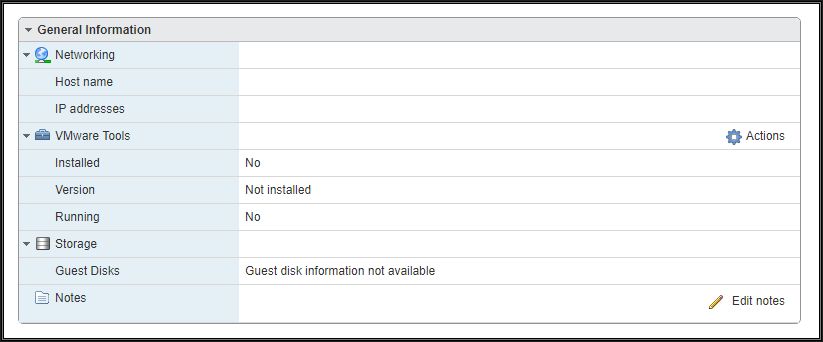
Under VMware Tools, if No is present next to Installed, VMware Tools is not currently installed.
If VMware Tools is installed and running, VMware Tools Running Status states Installed and Running, and an IP Address is displayed. Also, the VMware Tools Version Status states - Current. If VMware Tools is not installed, please continue with the following steps. ESXi 7.0 states - VMware Tools version is compliant.
As you can see from the above information VMware Tools has not been installed on any of our virtual machines, "My First Linux Virtual Machine" or "My First Windows Virtual Machibe". Please see my EE Article Part 10: HOW TO: Install VMware Tools for Linux on a VMware Linux virtual machine on a VMware vSphere Hypervisor 7.0 (ESXi 7.0) Host Server to install VMware Tools on "My First Linux Virtual Machine". To install VMware Tools on Windows, please continue with this tutorial.
Right-click the virtual machine "My First Windows Virtual Machine" and Select Power On, the virtual machine should automatically boot the operating system. Then select the Open Console function so you can interact with the virtual machine. You may find it easier if you Right-Click the virtual machine "My First Windows VM" and Select Open Console.
The virtual machine should automatically boot the operating system. The Open Console function is similar to the Keyboard/Video Machine (KVM) function in a datacentre, which allows you to toggle between console screens of computers, it allows you to interact with the virtual machine, with keyboard and mouse movements, and displays the screen. The Microsoft Windows Server 2016 console screen will be displayed.
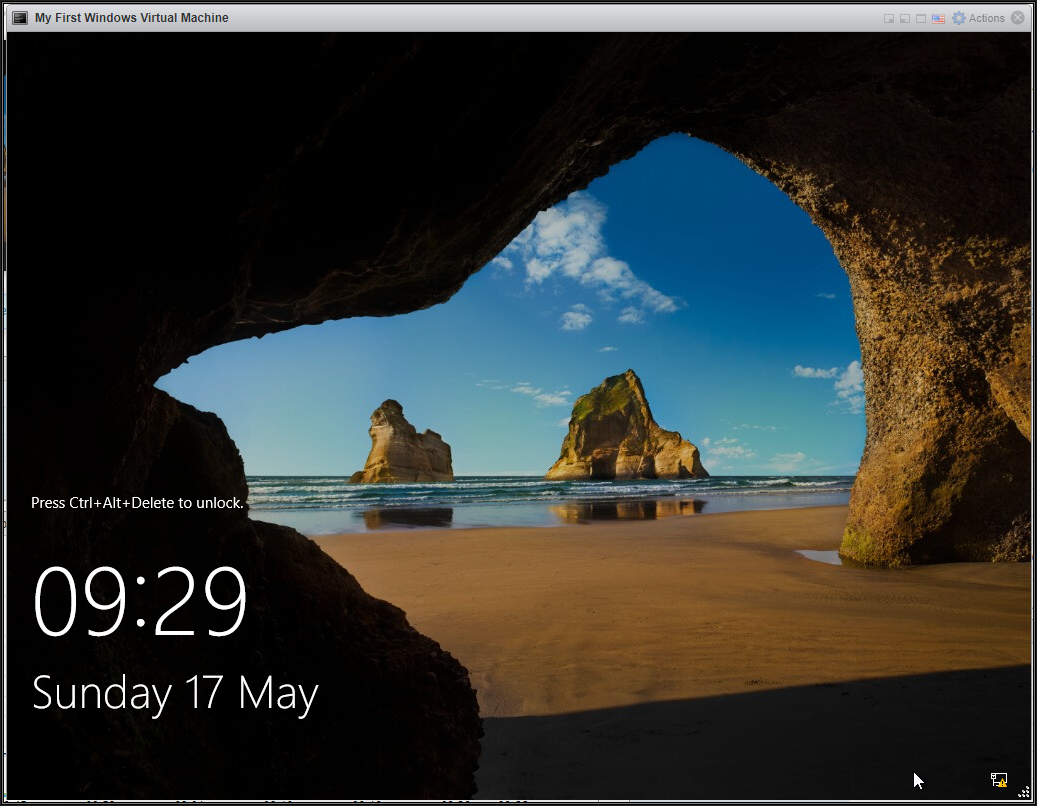
Select Actions > Guest OS > Send Keys > CTRL-ALT-DEL

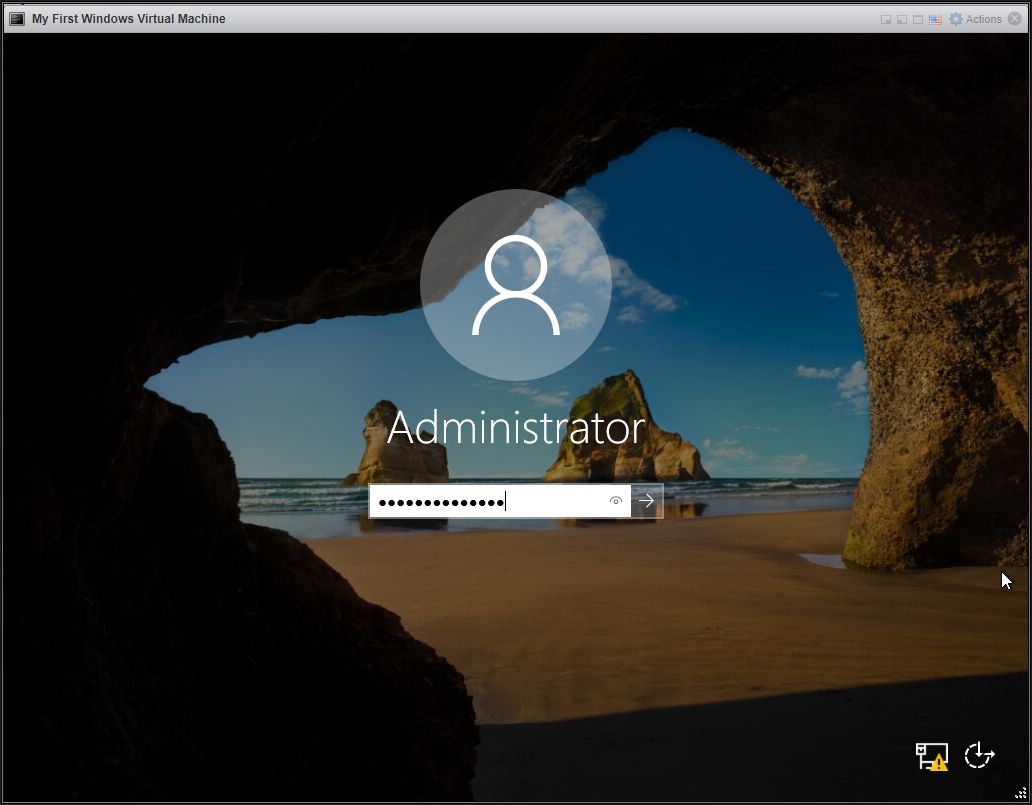
Password Entered
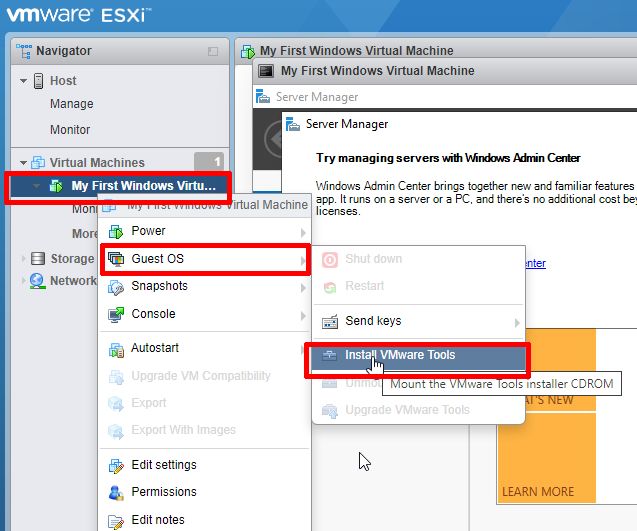
Select Actions > Guest OS > Install VMware Tools
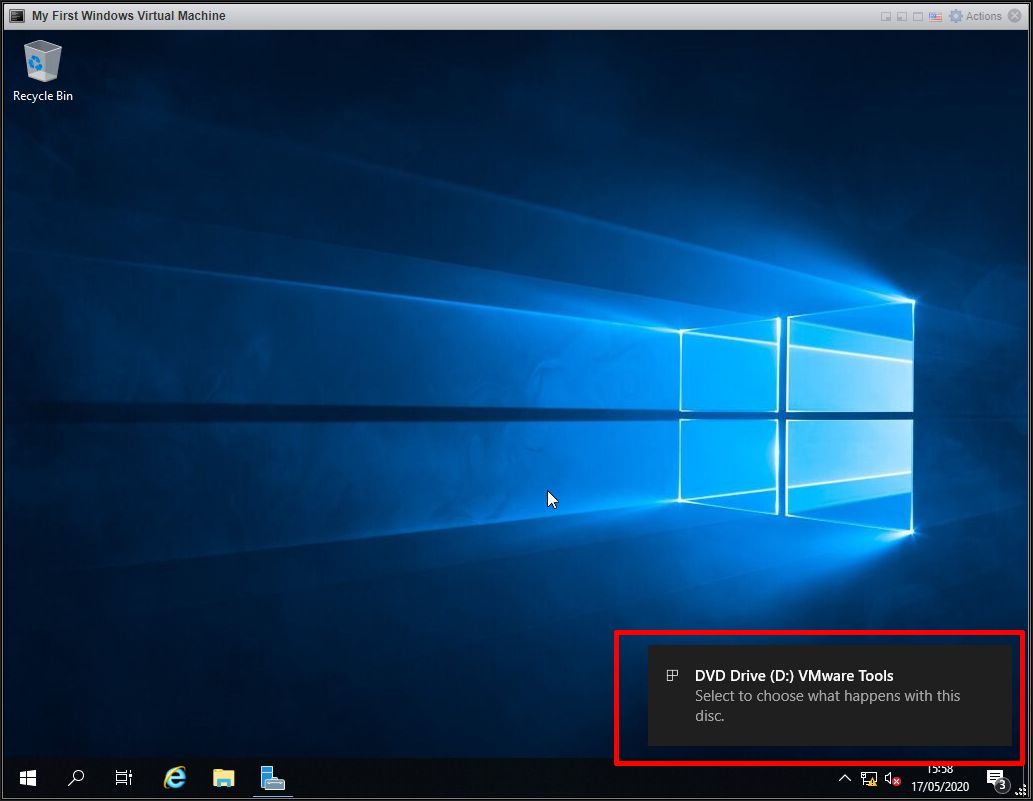
This process connects a VMware Tools for Windows (windows.iso) iso file image to the CD-ROM device in the virtual machine. If VMware Tools fails to run, ensure that your virtual machine has a CD-ROM device added. If Autorun for CD-ROM is enabled in the virtual machine operating system, the VMware Tools for Windows setup.exe installation program will start to run automatically. However, in later operating systems, it was discovered that enabling Autorun in the operating system, highlighted a security risk, so in modern operating systems it has been disabled. If Autorun has been disabled on your operating system, you will need to manually select the CD-ROM drive.
The windows.iso is stored in the following location on the ESXi server (/vmimages). It has been known, sometimes they are missing! VMware Tools updates are supplied with later versions of ESXi, but are also available for download from VMware - https://packages.vmware.com/tools.
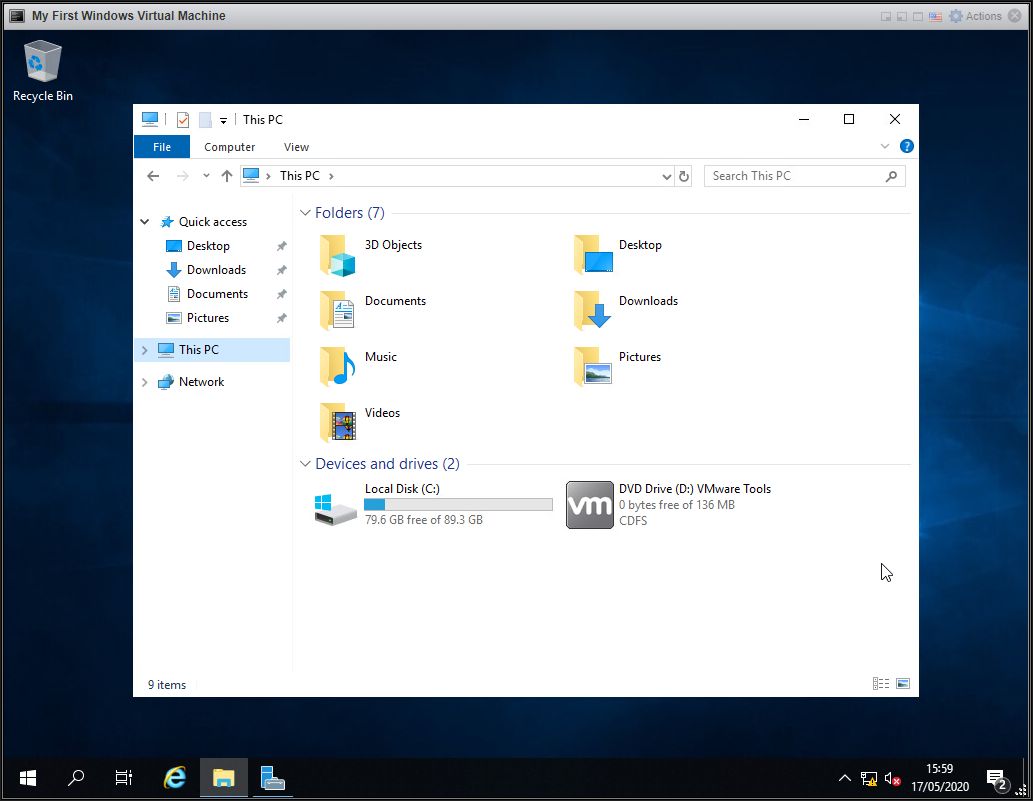
Select the CD-ROM/DVD-DRIVE, this could be your D: drive.

Right, Click the CD-ROM/DVD-DRIVE and select Install or run program from your media, this statement could be different for your operating system.
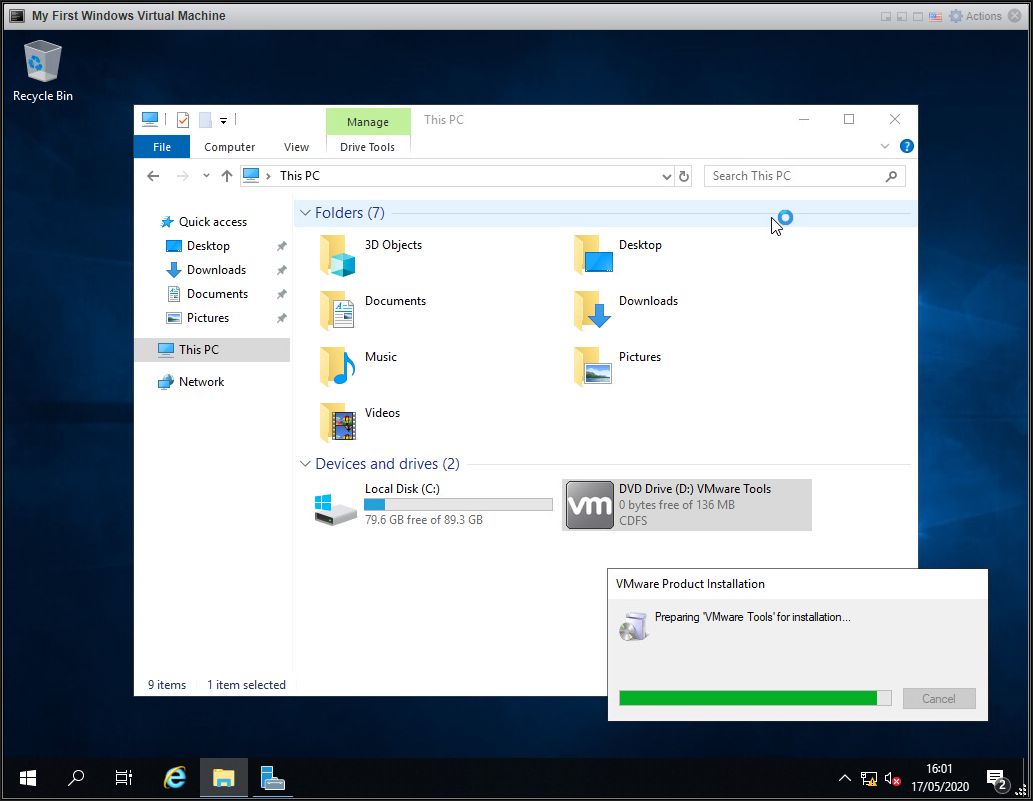
The VMware Tools installation will start
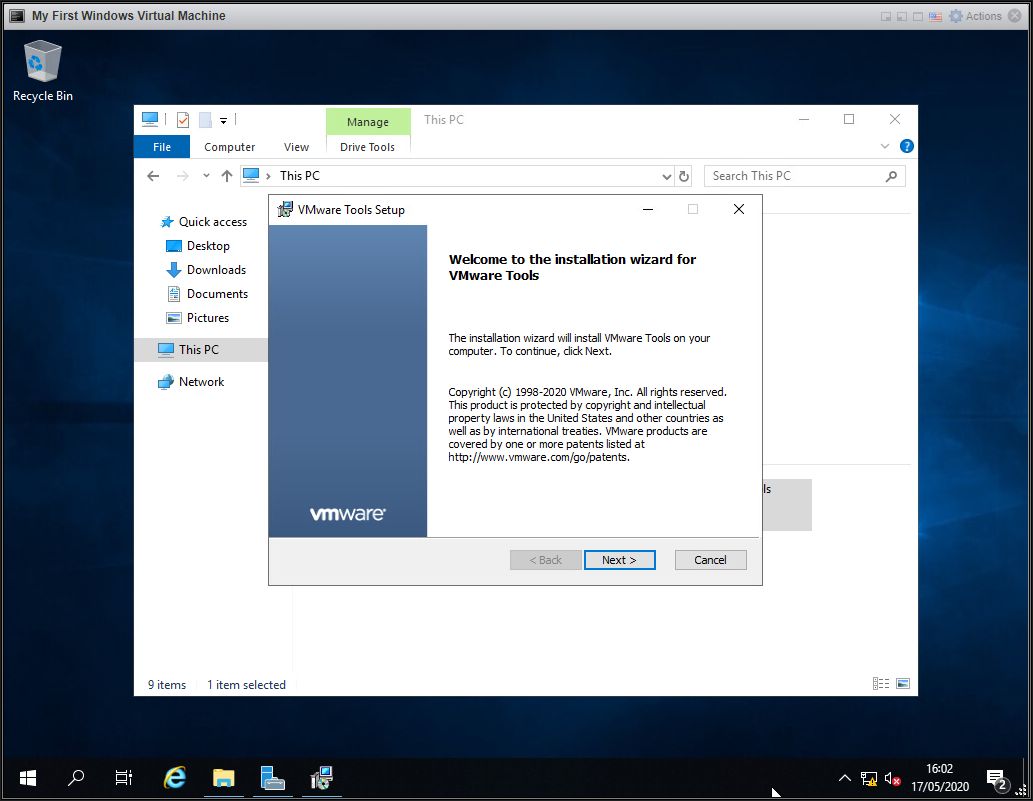
At the Welcome to the installation wizard for VMware Tools click Next to continue with the installation
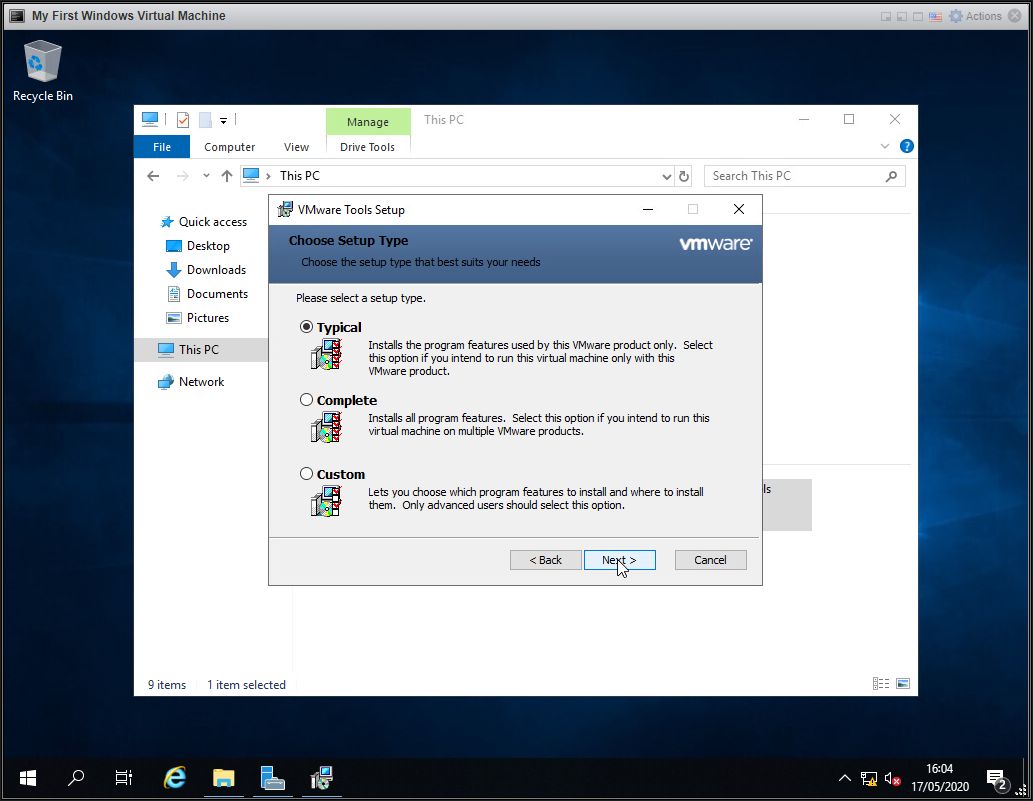
At the Setup Type select Typical and click Next to continue with the installation
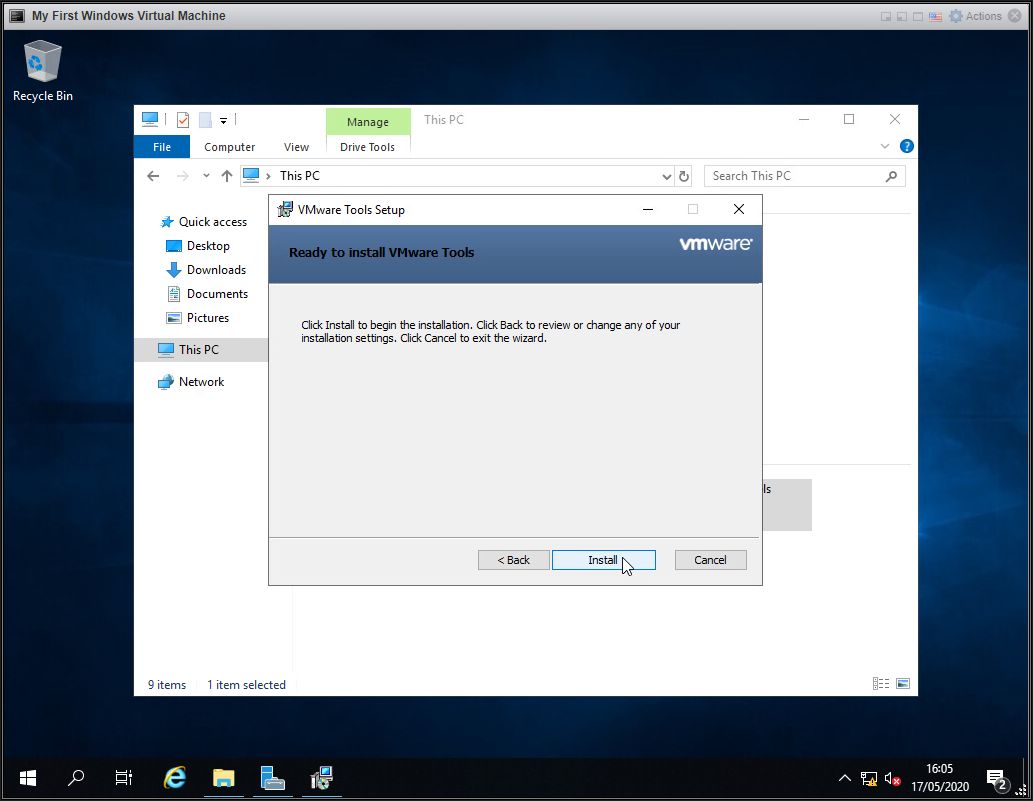
At the Ready to Install the Program, click Install to continue the installation.
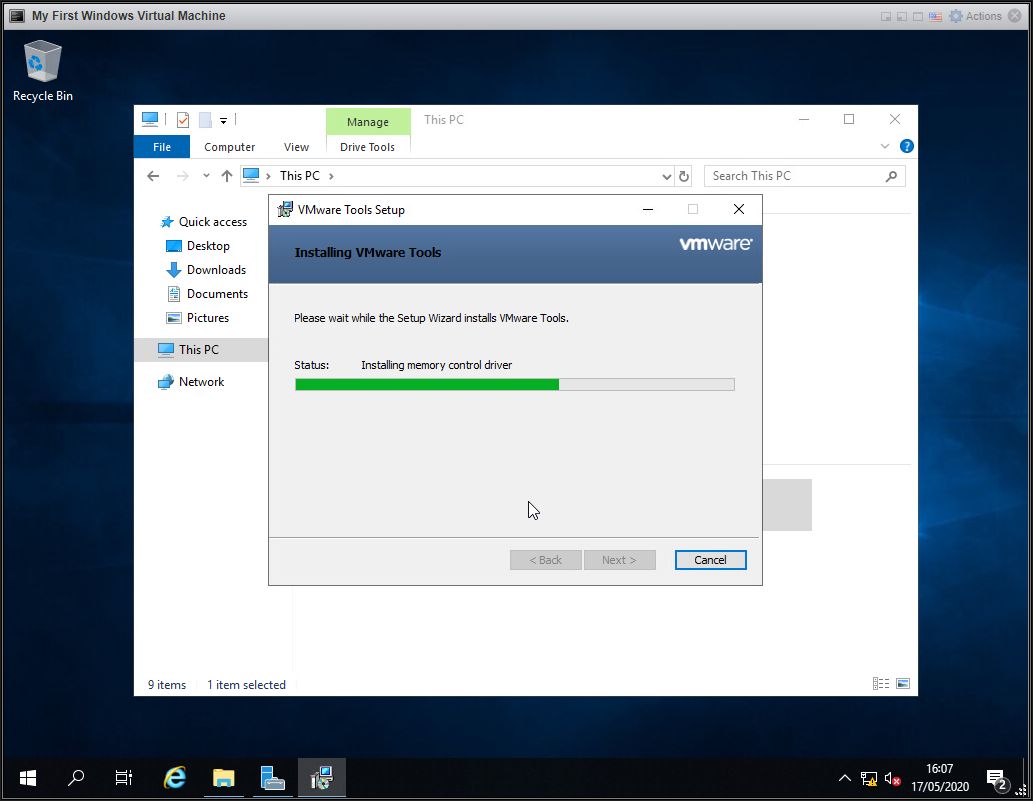
VMware Tools will start installing...

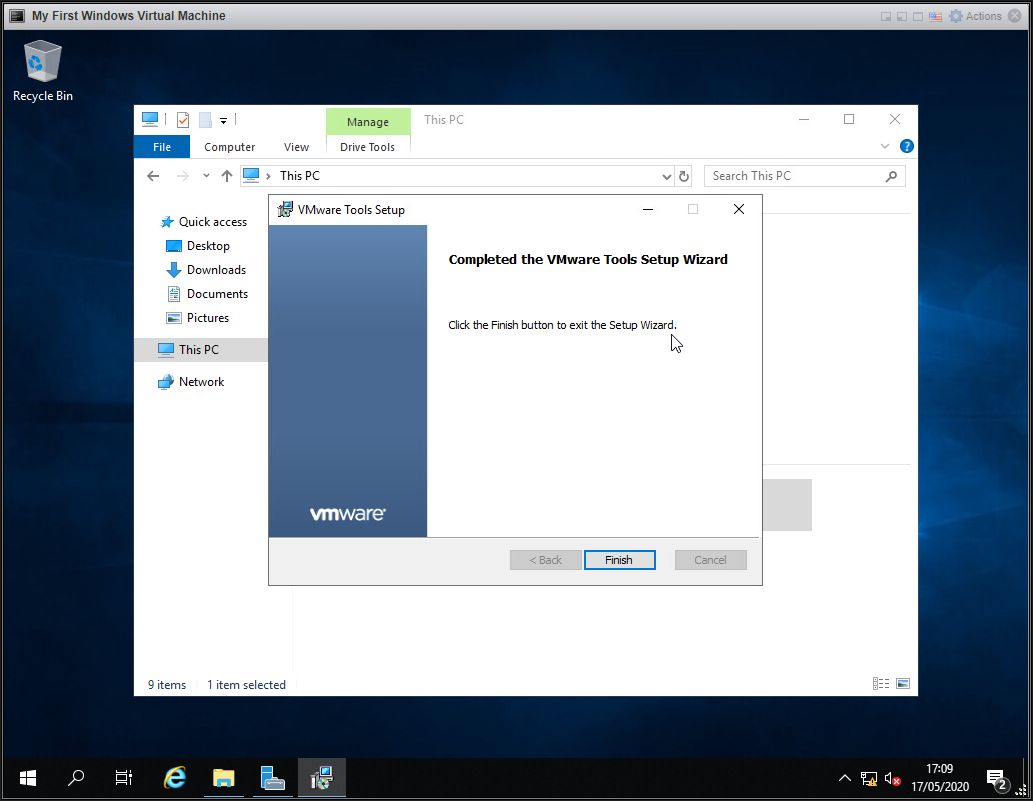
Click Finish.

At the VMware Tools, You must restart your system...." prompt select Yes to restart the virtual machine. When the virtual machine has restarted.
If you now repeat Step 2 above Checking if VMware Tools is installed in the Virtual Machine

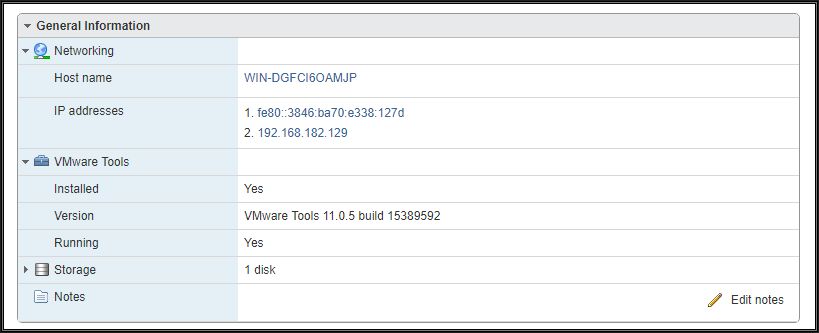
An IP address is now displayed, which is the IP address of the virtual machine, VMware Tools Status - Installed and Running, and VMware Tools Version Status - 11.0.5 build 15389592.
VMware Tools has come under much scrutiny in the last few years, with security issues and critical updates. Some of these updates are now provided by Microsoft as part of the monthly update cycle. So you may notice Windows updates also applying fixes for VMware drivers which are often included within VMware Tools.
Third-Party patching applications such as Ivanti Patch Manager for Windows also detect these vulnerabilities and applies VMware Tools updates.
In this tutorial ESXi 7.0, includes VMware Tools 11.0.5 Build 15389592. The release notes are here. But at the time of writing this article, VMware Tools 11.1.0 was released. Two releases of VMware Tools in less than 1 month!
Please note upgrading VMware Tools on a Production Server, may require a restart without warning!
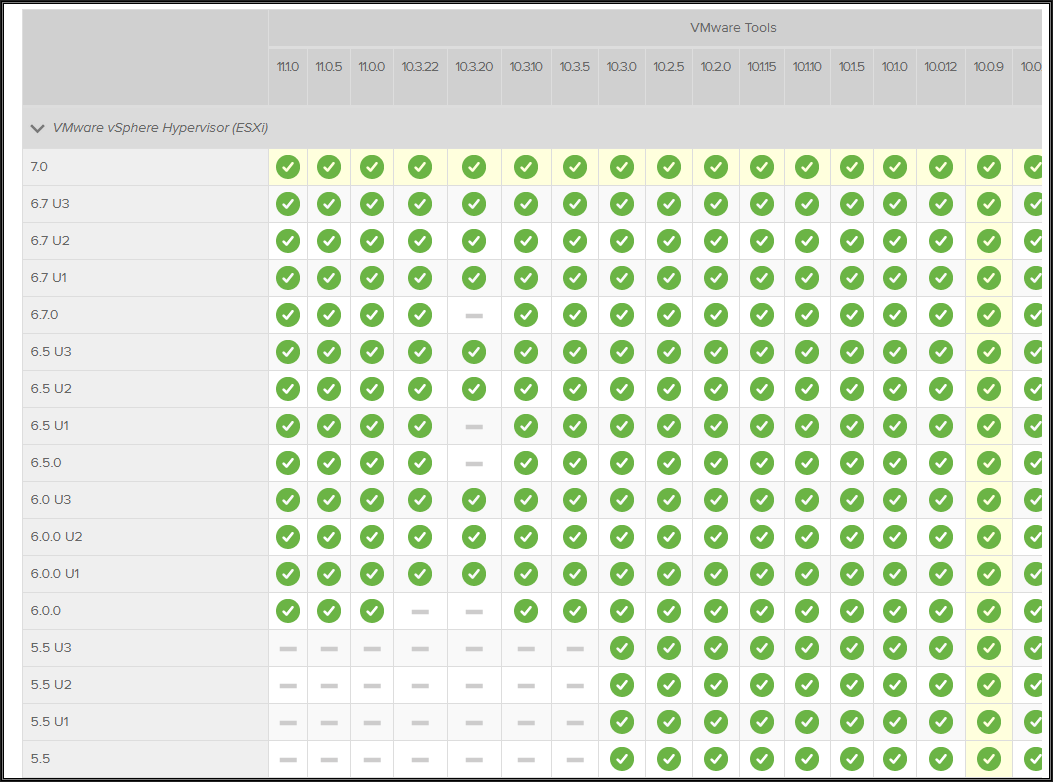
and the VMware Product Interoperability Matrices shows you which versions of VMware Tools are compatible with different ESXi versions.
Congratulations, you have successfully installed VMware Tools for Windows on a VMware Windows virtual machine on a VMware vSphere Hypervisor 7.0 (ESXi 7.0) Host Server
Please see my next article in this series Part 10: HOW TO: Install VMware Tools for Linux on a VMware Linux virtual machine on a VMware vSphere Hypervisor 7.0 (ESXi 7.0) Host Server
Basic VMware Articles Series:
These articles are also applicable to VMware vSphere Hypervisor ESXi 5.0, 5.5, 6.0.
These articles are applicable to VMware vSphere Hypervisor 6.5.
These articles are applicable to VMware vSphere Hypervisor 6.7.
Previous articles in this VMware vSphere 7.0 series are here.
If you found this tutorial helpful, please do click the Thumbs-Up icon below. This lets me know what is valuable for EE members and provides direction for future articles. If you have a related question based on this article, please click here.
Thank you very much! Regards, Andy
If you would like to read my Basic VMware articles, they are listed at the end of this article for your convenience.
In this series of basic VMware articles for the Novice, I'll be showing you the basic VMware skills required to install, configure and deploy virtual machines using VMware's FREE VMware vSphere Hypervisor (ESXi).
In this article we will show you HOW TO: Install VMware Tools for Windows on a VMware Windows virtual machine on a VMware vSphere Hypervisor 7.0 (ESXi 7.0) Host Server. This procedure can be followed to install VMware Tools on any Microsoft Windows operating system Virtual Machines provided they are supported by the version of VMware vSphere. You may want to consult the VMware Hardware Compatibility Lists or HCL, see here to check your operating system is compatible with VMware vSphere.
What is VMware Tools?
VMware Tools are a suite of utilities that enhances the performance of the virtual machine's guest operating system and improves the management of the virtual machine. Installing the VMware Tools package will greatly enhance graphics and mouse performance in your virtual machine. Without VMware Tools installed in your guest operating system, guest performance lacks important functionality.
You can check if you have VMware Tools installed by checking the Summary of your virtual machine using the VMware Host Client if using VMware vSphere 6.7 or 7.0. If VMware Tools is installed VMware Tools will read VMware Tools version is compliant. (in previous versions it stated OK) , an IP Address and DNS hostname will appear in the Summary page. If VMware Tools is not installed, it will state No, and Not installed. VMware Tools is not optional and should be installed with all virtual machines.
Also, a warning message will be displayed as follows
1. Connect to the VMware vSphere Hypervisor 7.0 (ESXi 7.0) or vSphere vCenter Server using the VMware Host Client.
Please refer to my EE article on Part 2: HOW TO: Connect to the VMware vSphere Hypervisor 7.0 (ESXi 7.0) using the vSphere (HTML5 Web) Host Client 7.0
Click the icon of the virtual machine.
Click the virtual machine.
2. Checking if VMware Tools is installed in the Virtual Machine
Check the summary information for the virtual machine.
Under VMware Tools, if No is present next to Installed, VMware Tools is not currently installed.
If VMware Tools is installed and running, VMware Tools Running Status states Installed and Running, and an IP Address is displayed. Also, the VMware Tools Version Status states - Current. If VMware Tools is not installed, please continue with the following steps. ESXi 7.0 states - VMware Tools version is compliant.
As you can see from the above information VMware Tools has not been installed on any of our virtual machines, "My First Linux Virtual Machine" or "My First Windows Virtual Machibe". Please see my EE Article Part 10: HOW TO: Install VMware Tools for Linux on a VMware Linux virtual machine on a VMware vSphere Hypervisor 7.0 (ESXi 7.0) Host Server to install VMware Tools on "My First Linux Virtual Machine". To install VMware Tools on Windows, please continue with this tutorial.
3. Interacting with the Virtual Machine
Right-click the virtual machine "My First Windows Virtual Machine" and Select Power On, the virtual machine should automatically boot the operating system. Then select the Open Console function so you can interact with the virtual machine. You may find it easier if you Right-Click the virtual machine "My First Windows VM" and Select Open Console.
The virtual machine should automatically boot the operating system. The Open Console function is similar to the Keyboard/Video Machine (KVM) function in a datacentre, which allows you to toggle between console screens of computers, it allows you to interact with the virtual machine, with keyboard and mouse movements, and displays the screen. The Microsoft Windows Server 2016 console screen will be displayed.
4. Log in to the virtual machine
Select Actions > Guest OS > Send Keys > CTRL-ALT-DEL
Password Entered
5. Installing Vmware Tools for Windows
Select Actions > Guest OS > Install VMware Tools
This process connects a VMware Tools for Windows (windows.iso) iso file image to the CD-ROM device in the virtual machine. If VMware Tools fails to run, ensure that your virtual machine has a CD-ROM device added. If Autorun for CD-ROM is enabled in the virtual machine operating system, the VMware Tools for Windows setup.exe installation program will start to run automatically. However, in later operating systems, it was discovered that enabling Autorun in the operating system, highlighted a security risk, so in modern operating systems it has been disabled. If Autorun has been disabled on your operating system, you will need to manually select the CD-ROM drive.
The windows.iso is stored in the following location on the ESXi server (/vmimages). It has been known, sometimes they are missing! VMware Tools updates are supplied with later versions of ESXi, but are also available for download from VMware - https://packages.vmware.com/tools.
Select the CD-ROM/DVD-DRIVE, this could be your D: drive.
Right, Click the CD-ROM/DVD-DRIVE and select Install or run program from your media, this statement could be different for your operating system.
The VMware Tools installation will start
At the Welcome to the installation wizard for VMware Tools click Next to continue with the installation
At the Setup Type select Typical and click Next to continue with the installation
At the Ready to Install the Program, click Install to continue the installation.
VMware Tools will start installing...
Click Finish.
At the VMware Tools, You must restart your system...." prompt select Yes to restart the virtual machine. When the virtual machine has restarted.
If you now repeat Step 2 above Checking if VMware Tools is installed in the Virtual Machine
An IP address is now displayed, which is the IP address of the virtual machine, VMware Tools Status - Installed and Running, and VMware Tools Version Status - 11.0.5 build 15389592.
VMware Tools has come under much scrutiny in the last few years, with security issues and critical updates. Some of these updates are now provided by Microsoft as part of the monthly update cycle. So you may notice Windows updates also applying fixes for VMware drivers which are often included within VMware Tools.
Third-Party patching applications such as Ivanti Patch Manager for Windows also detect these vulnerabilities and applies VMware Tools updates.
In this tutorial ESXi 7.0, includes VMware Tools 11.0.5 Build 15389592. The release notes are here. But at the time of writing this article, VMware Tools 11.1.0 was released. Two releases of VMware Tools in less than 1 month!
Please note upgrading VMware Tools on a Production Server, may require a restart without warning!
and the VMware Product Interoperability Matrices shows you which versions of VMware Tools are compatible with different ESXi versions.
Congratulations, you have successfully installed VMware Tools for Windows on a VMware Windows virtual machine on a VMware vSphere Hypervisor 7.0 (ESXi 7.0) Host Server
Please see my next article in this series Part 10: HOW TO: Install VMware Tools for Linux on a VMware Linux virtual machine on a VMware vSphere Hypervisor 7.0 (ESXi 7.0) Host Server
Basic VMware Articles Series:
These articles are also applicable to VMware vSphere Hypervisor ESXi 5.0, 5.5, 6.0.
These articles are applicable to VMware vSphere Hypervisor 6.5.
These articles are applicable to VMware vSphere Hypervisor 6.7.
Previous articles in this VMware vSphere 7.0 series are here.
- Part 7: HOW TO: Create your first Windows Virtual Machine on a VMware vSphere Hypervisor 7.0 (ESXi 7.0) Host Server
If you found this tutorial helpful, please do click the Thumbs-Up icon below. This lets me know what is valuable for EE members and provides direction for future articles. If you have a related question based on this article, please click here.
Thank you very much! Regards, Andy
EE Fellow, MVE, Expert of the Year 2021,2017-11, Scribe 2016-2012, Author of the Year 2018-6,2013-2012 VMware vExpert Pro, vExpert 2022-2011
Have a question about something in this article? You can receive help directly from the article author. Sign up for a free trial to get started.
Comments (0)