HOW TO: Create your first Linux Virtual Machine on a VMware vSphere Hypervisor 7.0 (ESXi 7.0) Host Server

Andrew Hancock (VMware vExpert PRO / EE Fellow/British Beekeeper)![]() VMware and Virtualization Consultant
VMware and Virtualization Consultant
 VMware and Virtualization Consultant
CERTIFIED EXPERT
EE Fellow, MVE, Expert of the Year 2021,2017-11, Scribe 2016-2012, Author of the Year 2018-6,2013-2012 VMware vExpert Pro, vExpert 2022-2011
Published:
Edited by: Andrew Leniart
Browse All Articles > HOW TO: Create your first Linux Virtual Machine on a VMware vSphere Hypervisor 7.0 (ESXi 7.0) Host Server
In this article, I will show you HOW TO: Create your first Linux Virtual Machine on a VMware vSphere Hypervisor 7.0 (ESXi 7.0) Host Server, the Linux Distribution we will install is Ubuntu 20.04 LTS Desktop Edition.
Ubuntu 20.0.4 LTS
In my previous Experts Exchange Articles , most have featured Basic and Intermediate VMware and Virtualisation Topics.
If you would like to read my Basic VMware articles, they are listed at the end of this article for your convenience.
In this series of basic VMware articles for the Novice, I'll be showing you the basic VMware skills required to install, configure and deploy virtual machines using VMware's FREE VMware vSphere Hypervisor (ESXi).
In this article we will show you HOW TO: Create your first Linux Virtual Machine on a VMware vSphere Hypervisor 7.0 (ESXi 7.0) Host Server using the VMware Host Client . This procedure can be followed to install ANY Linux distribution Virtual Machines on earlier versions of VMware vSphere provided they are supported by the version of VMware vSphere. You may want to consult the VMware Hardware Comparability Lists or HCL , see here .
Please refer to my previous article - HOW TO: Connect to the VMware vSphere Hypervisor 7.0 (ESXi 7.0) using the vSphere (HTML5 Web) Host Client 7.0
Please refer to my EE article on Part 4: HOW TO: Upload and Check the MD5 signature of an ISO CD/DVD image to a VMware datastore using the VMware Host Client, for use with VMware vSphere Hypervisor 7.0 (ESXi 7.0).
If you have already downloaded a Linux distribution as an ISO image file from the internet there is no need to create an iso image file if you have physical CD-ROM or DVD-ROM Windows media; Please refer to my EE article on HOW TO: Create an ISO CD-ROM/DVD-ROM image (*.iso), and MD5 checksum signature, for use with VMware vSphere Hypervisor 7.0 (ESXi 7.0)
In this example, we will use Ubuntu 20.04 LTS Desktop edition, this can be uploaded to the datastore, esx001_local1_vmfs6, using the previous EE Article - HOW TO: Upload and Check the MD5 signature of an ISO CD/DVD image to a VMware datastore using the VMware Host Client, for use with VMware vSphere Hypervisor 7.0 (ESXi 7.0).
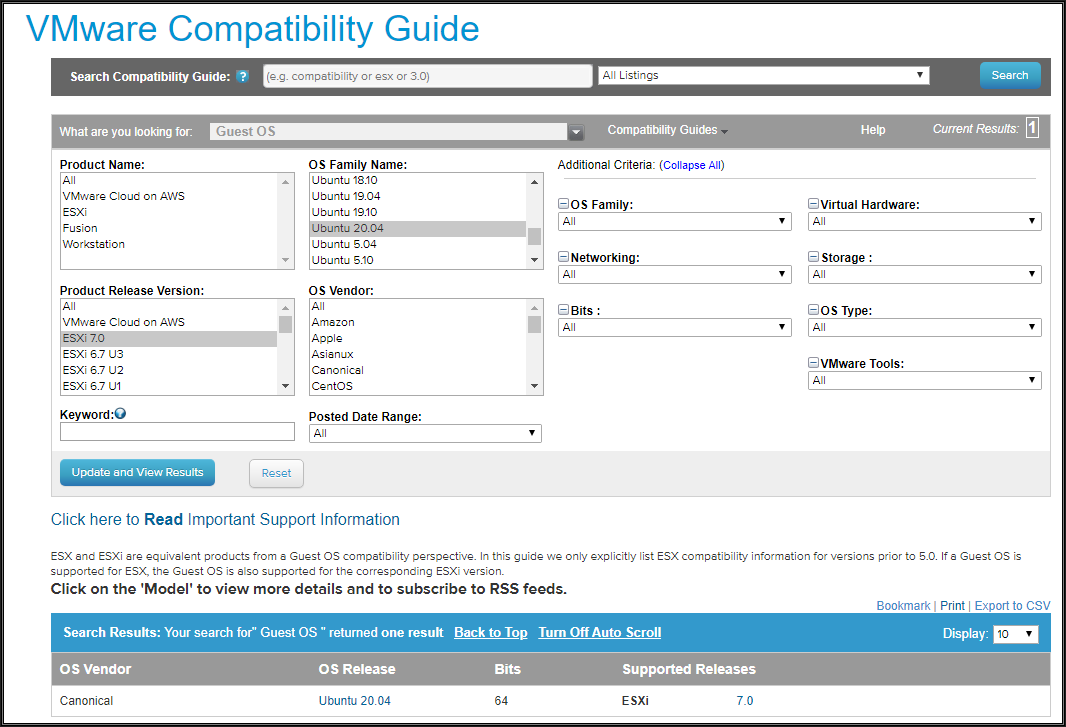
Please note and check the VMware Hardware Comparability Lists (HCL) here , to check your Operating System is compatible with VMware vSphere. Many operating systems fail to install because the operating system is not supported by the version of VMware vSphere being used. In the following screenshot from the HCL , we can clearly see this is supported for the version of VMware vSphere 7.0 we are using in this tutorial.
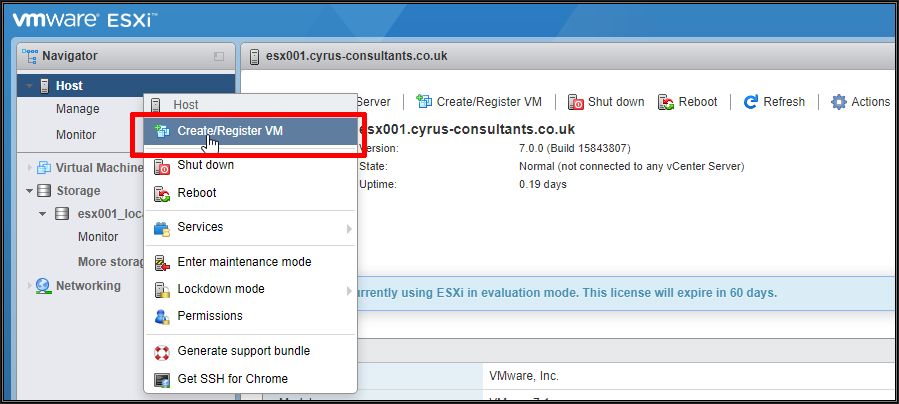
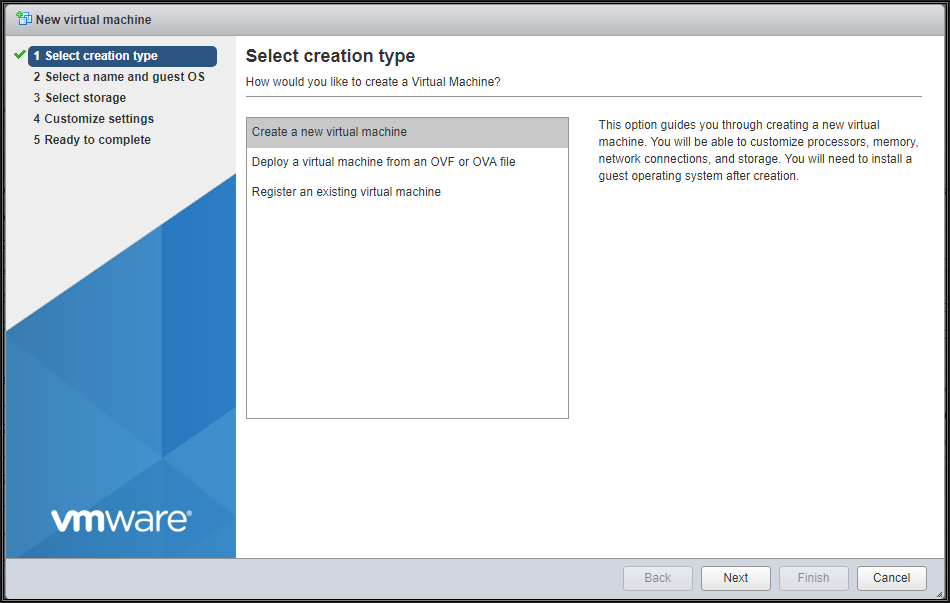
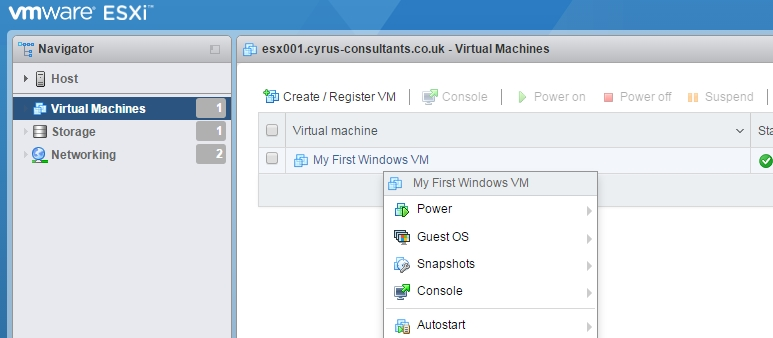
Right Click Virtual Machine and select Create/Register VM. This will open up a wizard and guide you through the process of creating the virtual machine configuration.

After selecting Create New Virtual Machine, the Create New Virtual Machine dialogue box and wizard will be displayed. This allows you to specify your requirements for the virtual machine, the number of processors, the amount of memory, storage required, and network card, these are the basic requirements, which are needed to create a virtual machine.
Take a few minutes to think about your virtual machine requirements, Ask yourself the question - What would you specify when purchasing a physical machine or server? These values can be changed and amended later, e.g. add additional processors, increase memory or storage space. It's much easier to grow storage than reduce it later, so my advice would be to start small, and later grow your resources, by looking at the performance of the virtual machine.
In a previous EE Article, we discuss performance, see here - HOW TO: Performance Monitor vSphere 4.x or 5.0 . One of the many advantages of virtual machines, we have greater flexibility to add and remove resources, compared to a physical computer or server. We also have very fine controls, or granular controls over machine specifications, e.g. memory, most memory components in physical servers today are in 4GB DIMM increments, using virtualization, we can increase memory in 256MB or 512MB increments! This is not easy to complete with physical computers, we cannot cut a memory DIMM in half!
The Create Virtual Machine Wizard creates the configuration or machine specification for us to install our operating system later. It includes some specification templates, based on the vendors minimum requirements for the Operating System selected.

Select Create a new virtual machine followed by next.

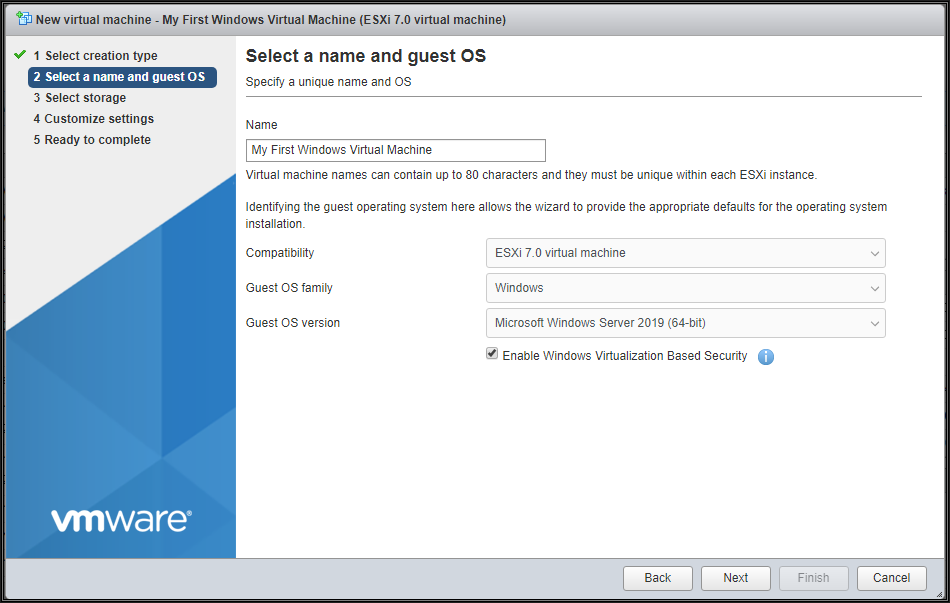
Enter a Name for the virtual machine and click Next.
This is the name which will appear in the inventory, this is not to be confused with the operating system's hostname, which will be set when we install the operating system. In the example, I have entered the name " My First Linux Virtual Machine ". This is not a good example, and I would not recommend the use of spaces for production servers, use hyphens or underscores!
Select the Guest OS Family, and Guest OS version. Leave the Compatibility set to ESXi 7.0 virtual machine.
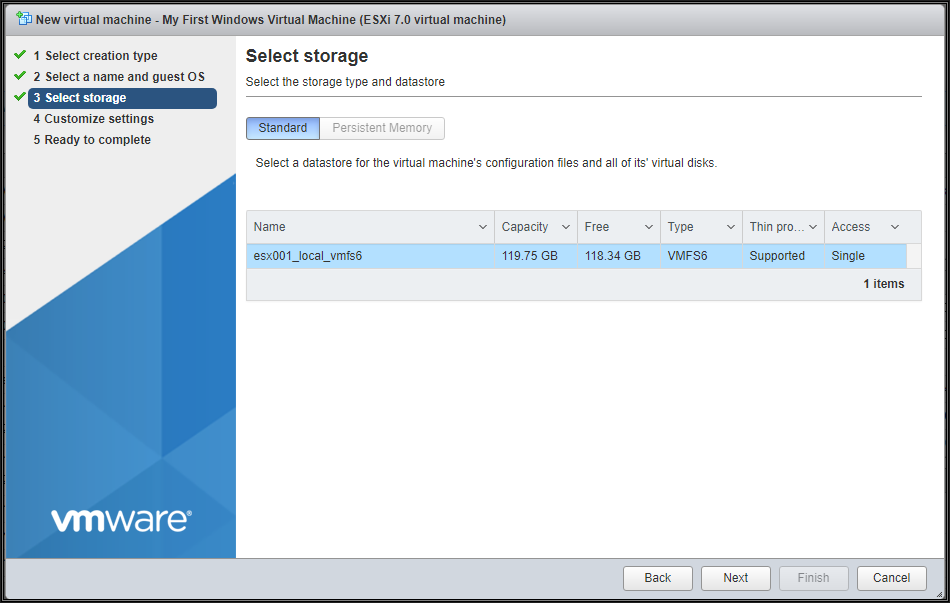
Click Next to continue, select the datastore to store the virtual machine configuration files and virtual machine disks and click Next to continue through the wizard
In my previous EE articles, we discussed datastore creation see here
Part 1: HOW TO: Install and Configure VMware vSphere Hypervisor 7.0 (ESXi 7.0)
Part 2: HOW TO: Connect to the VMware vSphere Hypervisor 7.0 (ESXi 7.0) using the vSphere (HTML5 Web) Host Client 7.0

Select the storage datastore to use to store the virtual machine, followed by Next.

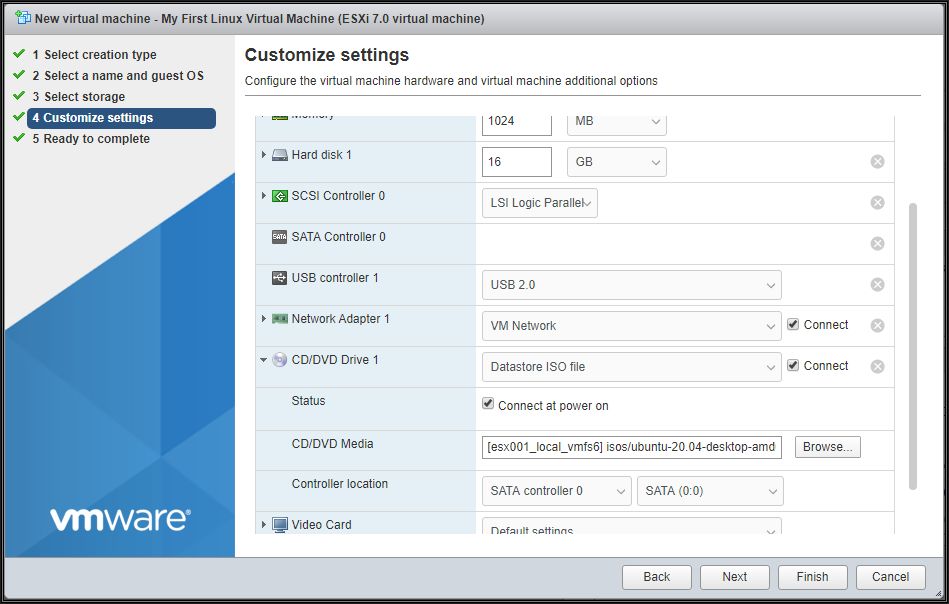
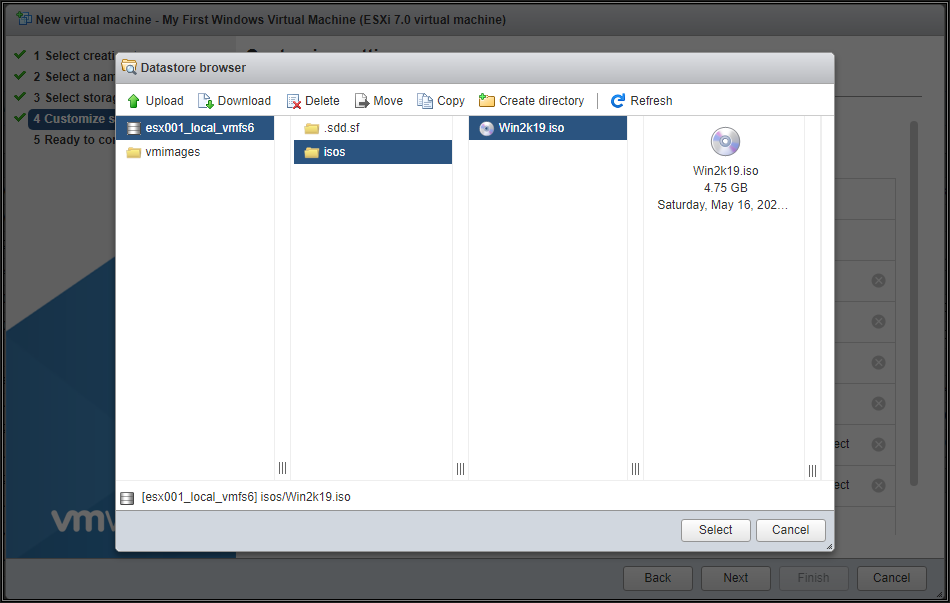
Customize Settings - Configure the virtual machine hardware and virtual machine additional options, and click Next to continue. Make sure you select the Datastore iso, you have already uploaded.

Select the required virtual disk size, this is the size of the disk for the operating system installation. The default size is provided based on vendors minimum recommendations.
Please note: I t's very easy to increase the disk size of a virtual machine after installation, please see my previous EE Article - HOW TO: Resize a VMware (VMDK) Virtual Disk , However, it's more difficult to shrink a virtual disk. So we would always recommend, starting small and growing later. The only VMware supported procedure to shrink a virtual disk, is to use VMware vCenter Converter Standalone, and create a V2V, which is also covered in my previous EE Articles listed here
HOW TO: Shrink or Reduce a VMware Virtual Machine Disk (VMDK) using VMware vCenter Converter Standalone v5.5.2 (same procedure for 6.2.0.1).
HOW TO: P2V, V2V for FREE - VMware vCenter Converter Standalone 6.2.0.1
Click Finish to create the virtual machine configuration.

The virtual machine will be created. If you check the Host Inventory, you will see your Virtual Machine - "My First Linux Virtual Machine" listed in the inventory. If you have been following this series, you may also see the virtual machine we created in this article - Part 7: HOW TO: Create your first Windows Virtual Machine on a VMware vSphere Hypervisor 7.0 (ESXi 7.0) Host Server
Installing Ubuntu 20.04 LTS Desktop Edition in the Virtual Machine hosted on the VMware vSphere Hypervisor 7.0 (ESXi 7.0) Host Server is very similar, to installing the Ubuntu 20.04 LTS Desktop Edition on a physical computer or server, with a few differences, which we will list below.
The very first time a virtual machines boots, its' BOOT order in the CMOS BIOS is set to CD-ROM. After the installation has been successful, this is reset to Hard Disk.
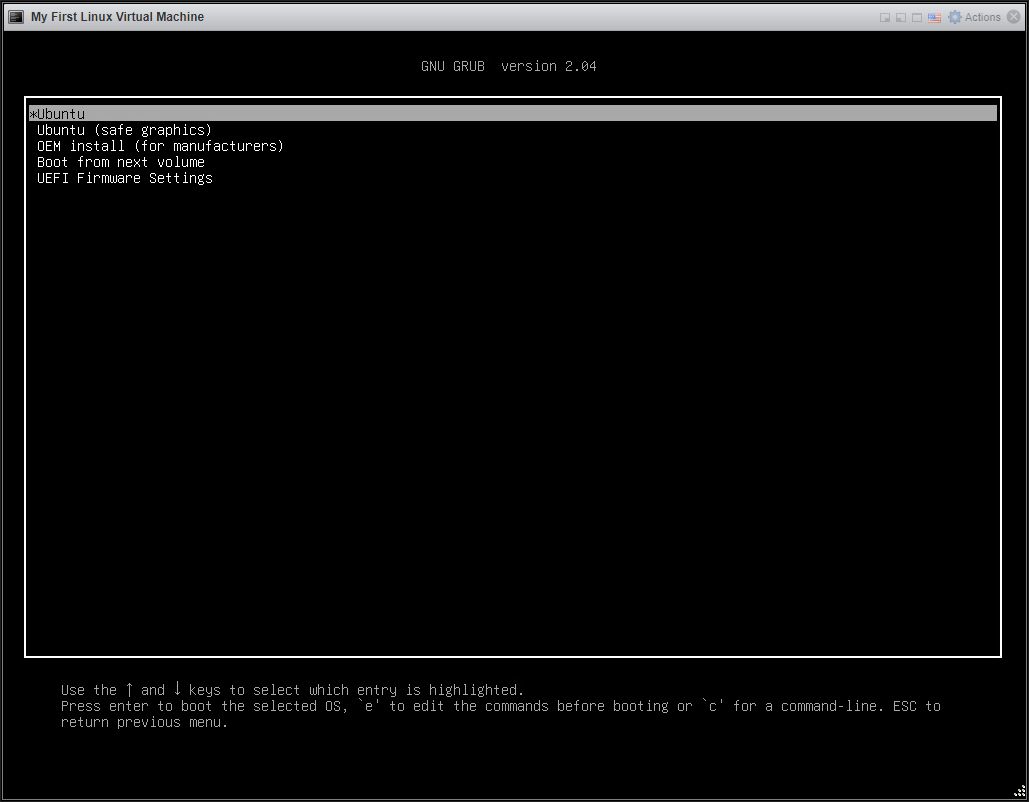
Right-click the virtual machine "My First Linux Virtual Machine" and select Power On. The virtual machine should automatically boot from the CD-ROM ISO image file. Then select the Console function so you can interact with the virtual machine.

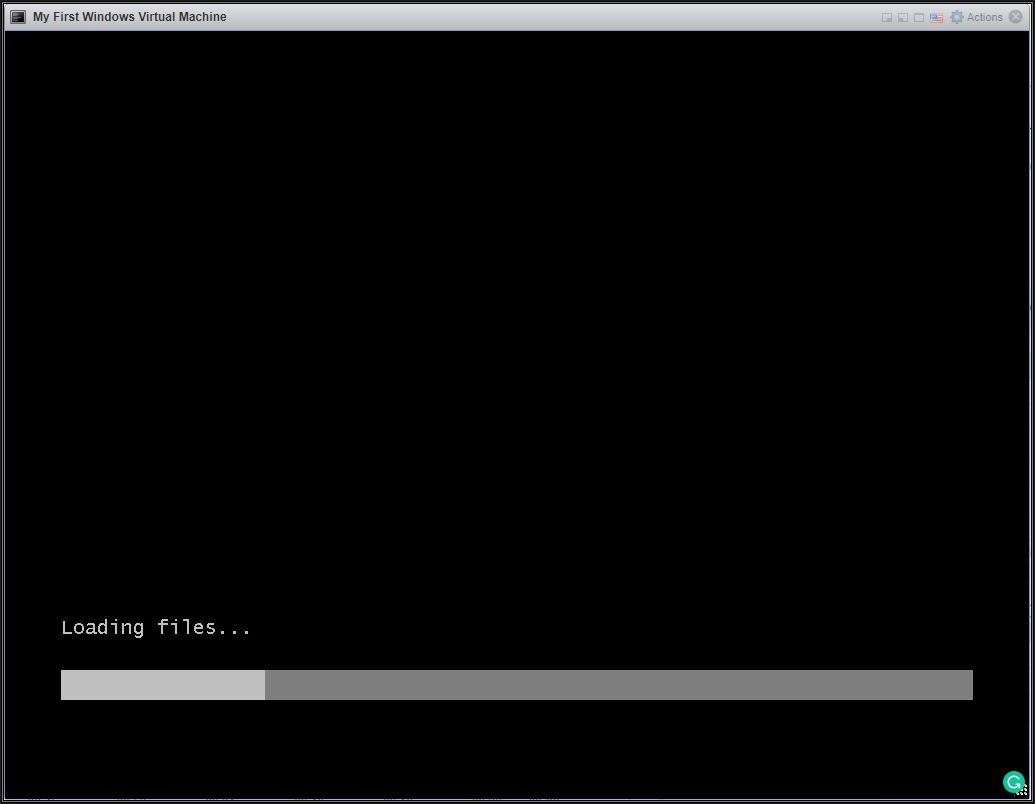
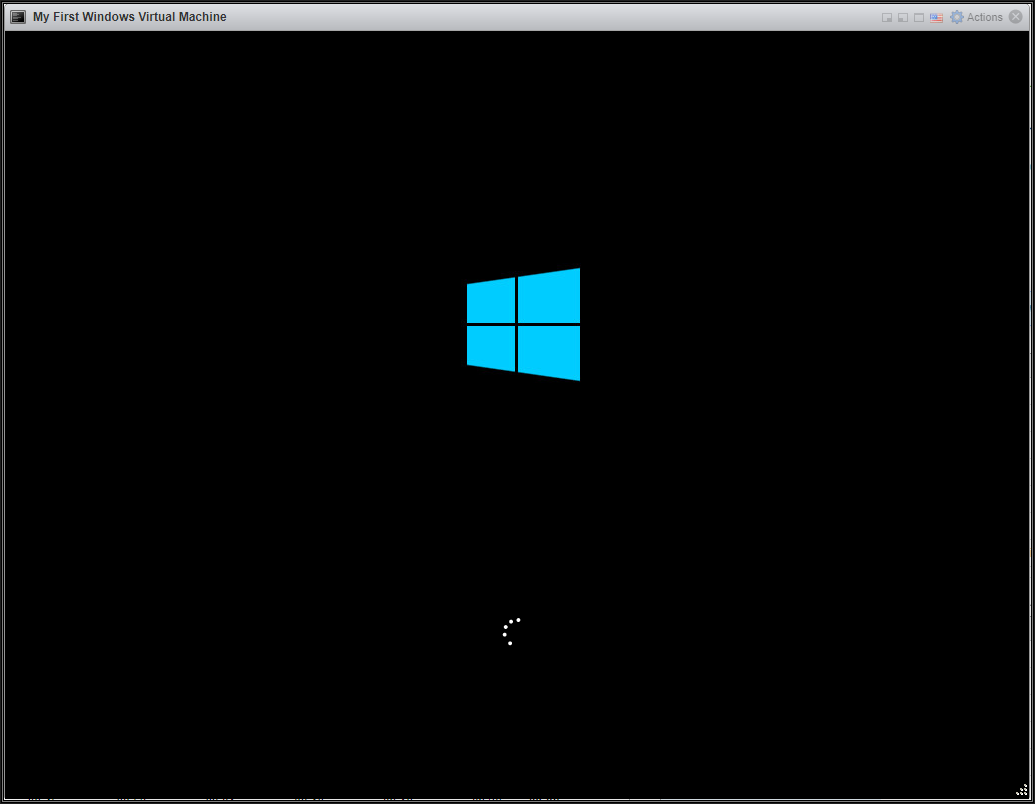
The virtual machine should automatically boot from the CD-ROM/DVD-ROM ISO image file. The Console function is similar to the Keyboard/Video Machine (KVM) function in a datacentre, which allows you to toggle between console screens of computers, it allows you to interact with the virtual machine, with keyboard and mouse movements, and displays the screen. The Ubuntu installation start-up process.
Hit Enter to Continue.
The installer will verify the installation media and check for errors and corruption before continuing.
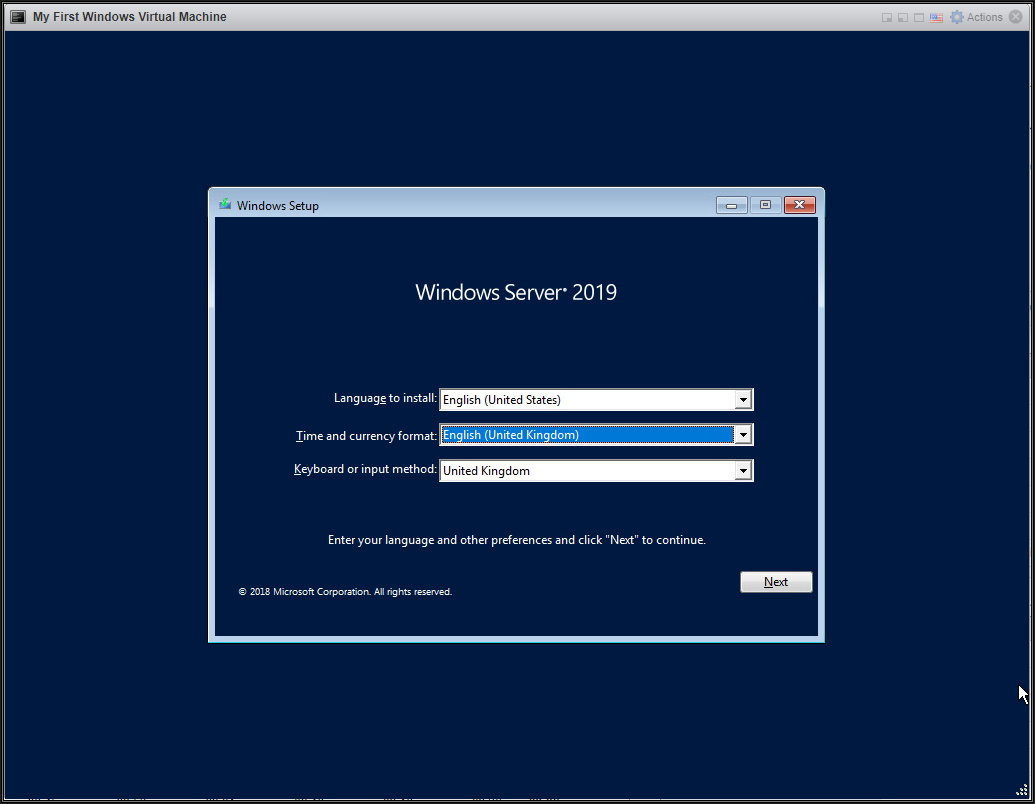
Select your Language
Click Install Ubuntu
The following screen will be displayed - select your keyboard layout and select continue
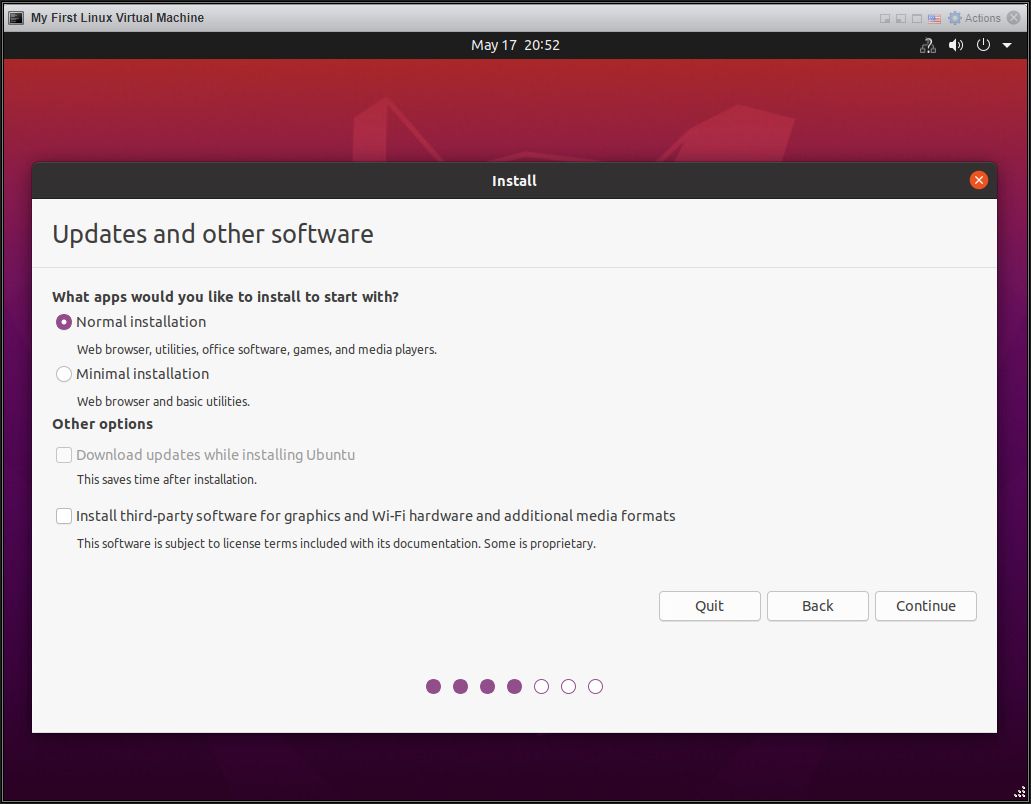
Select Normal installation and click continue
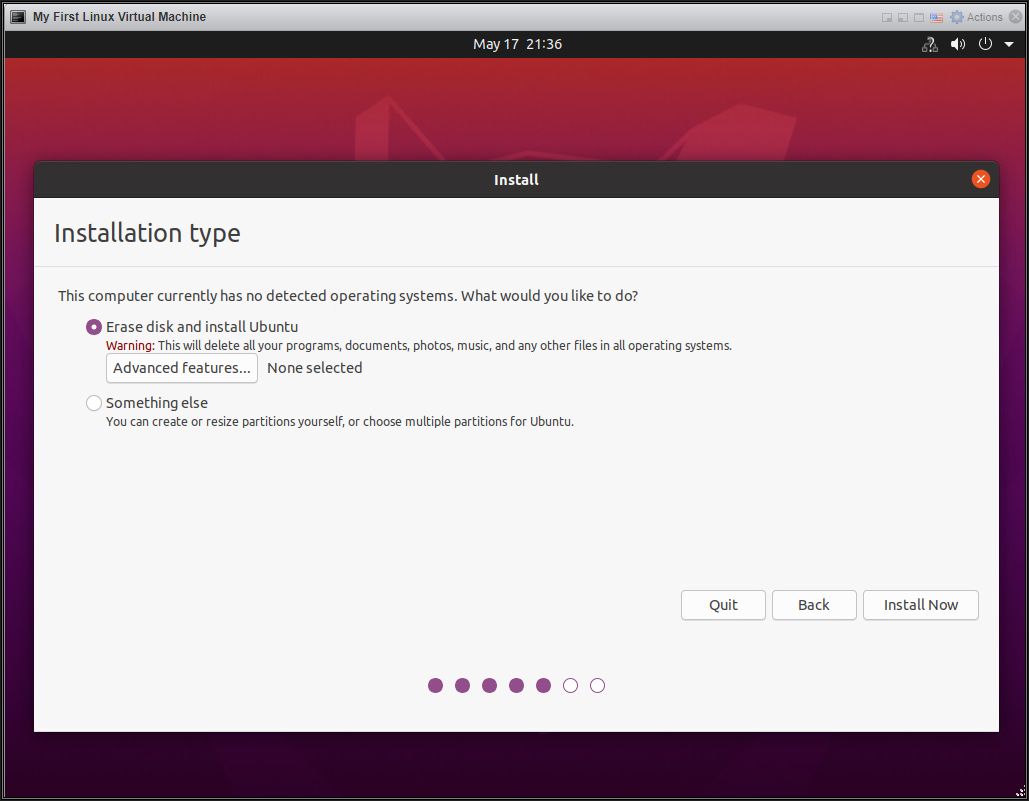
Select Erase disk and install Ubuntu, and click Install Now
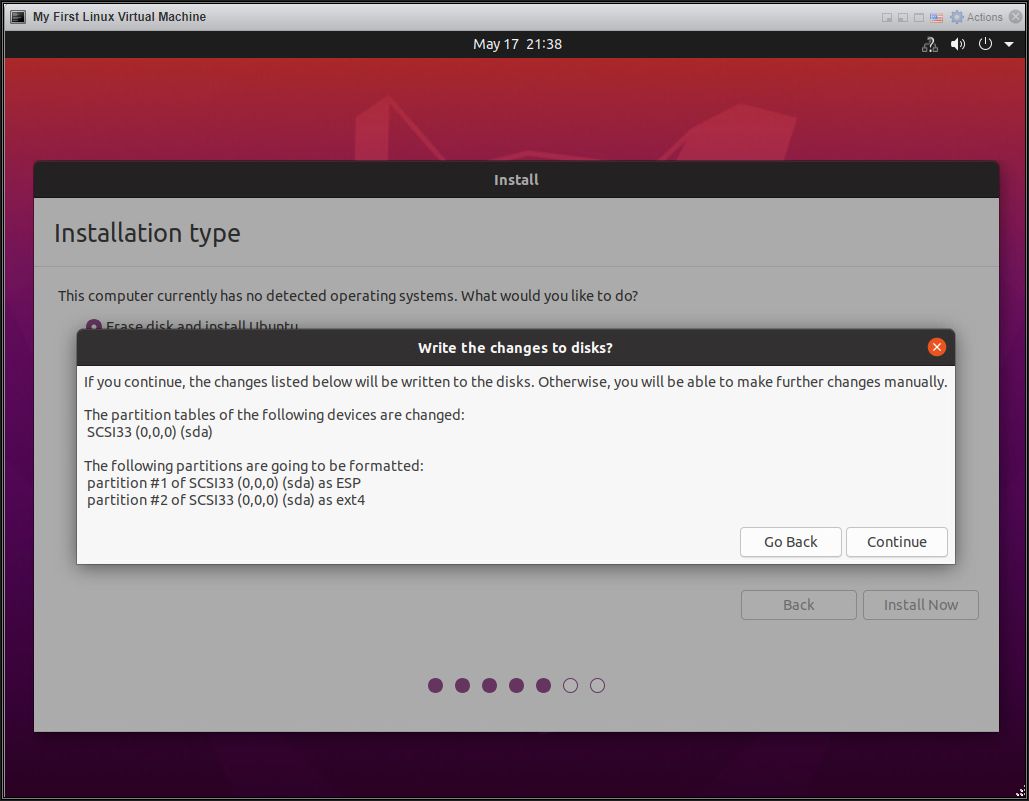
Select continue to confirm the partition changes to the disk.
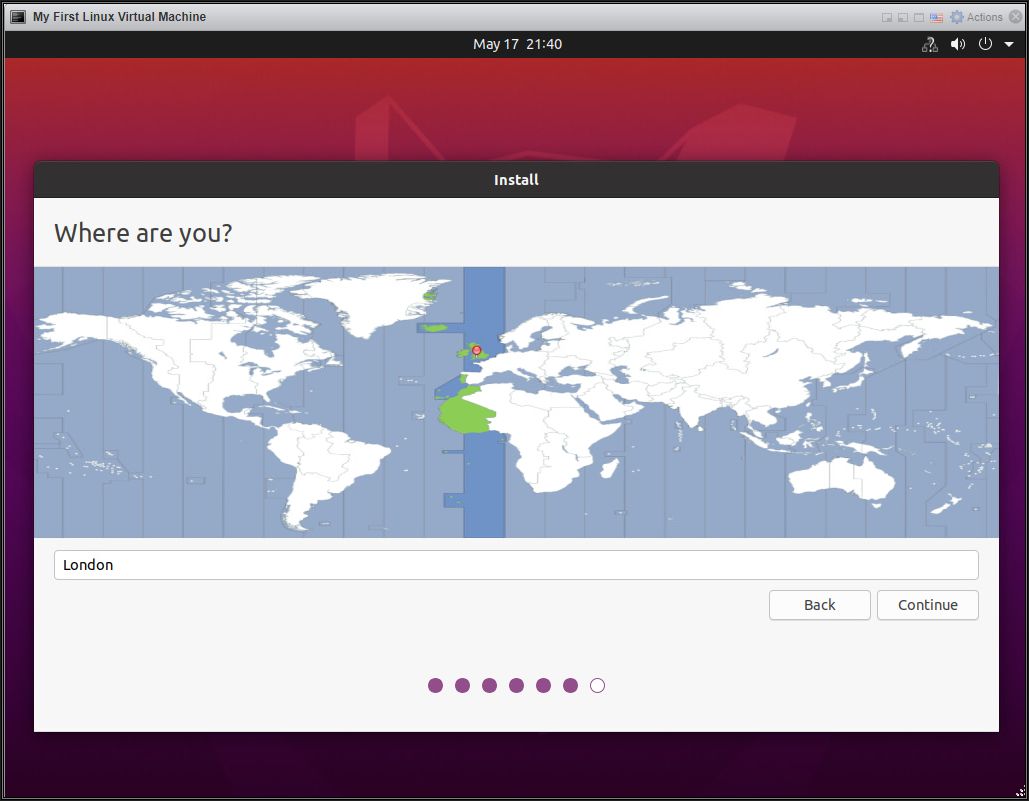
Select your time zone and click continue.
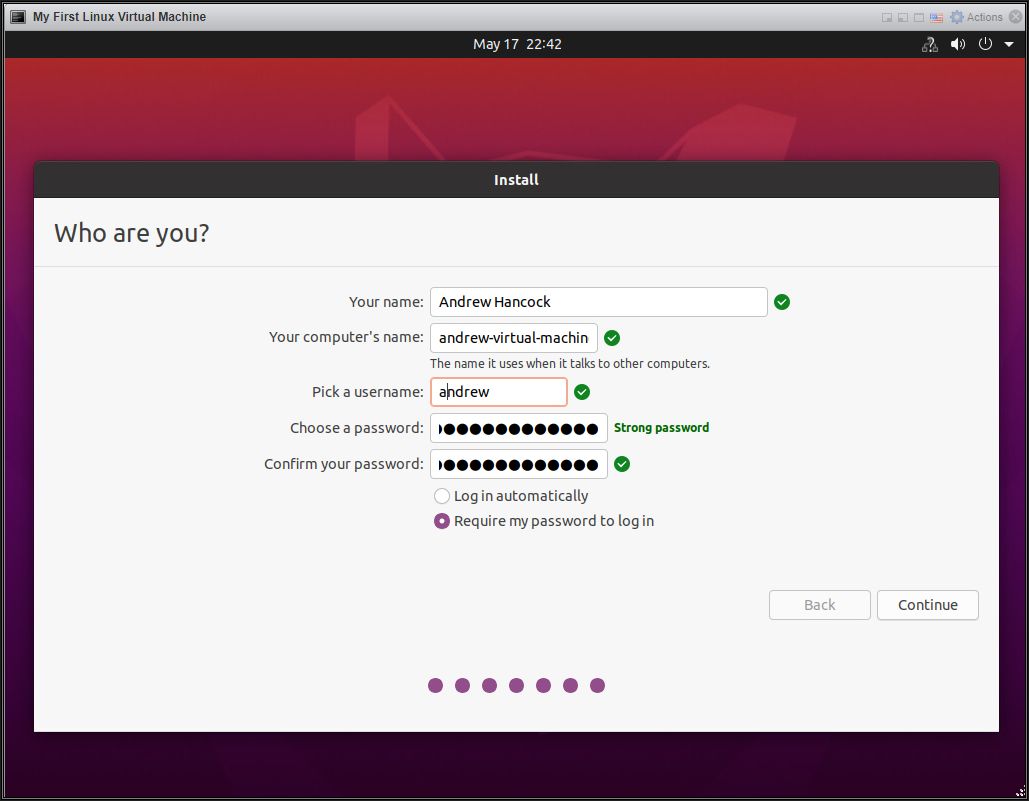
Enter your name, computer name, account name and password, and click continue.
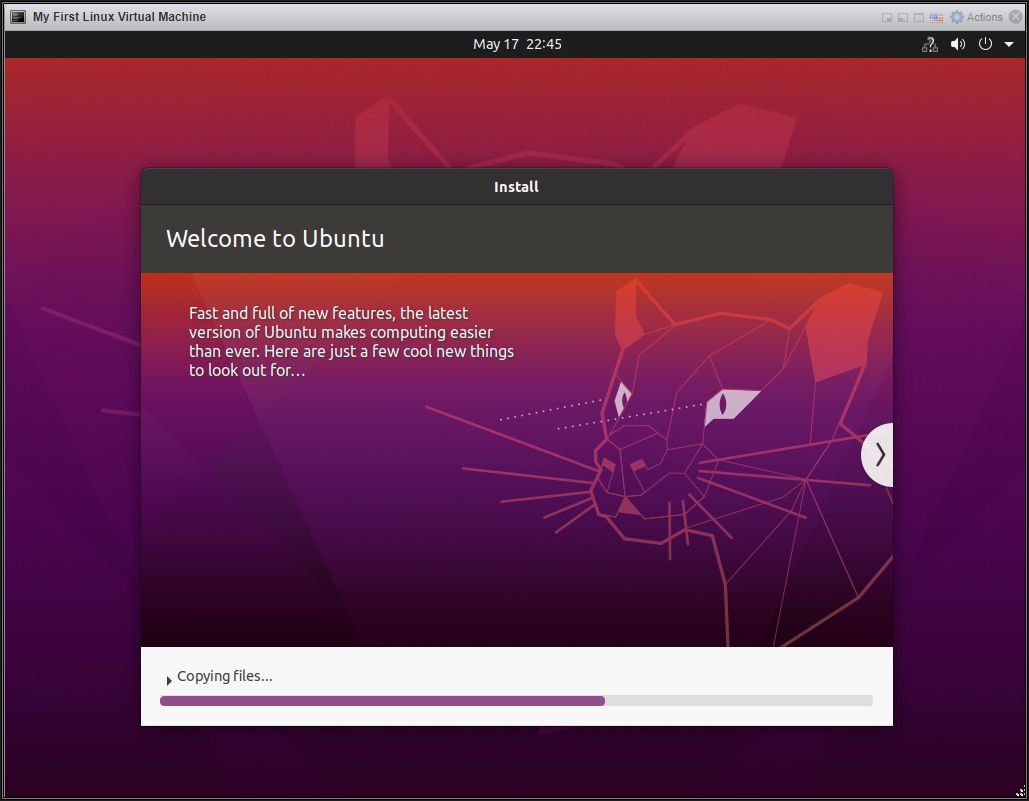
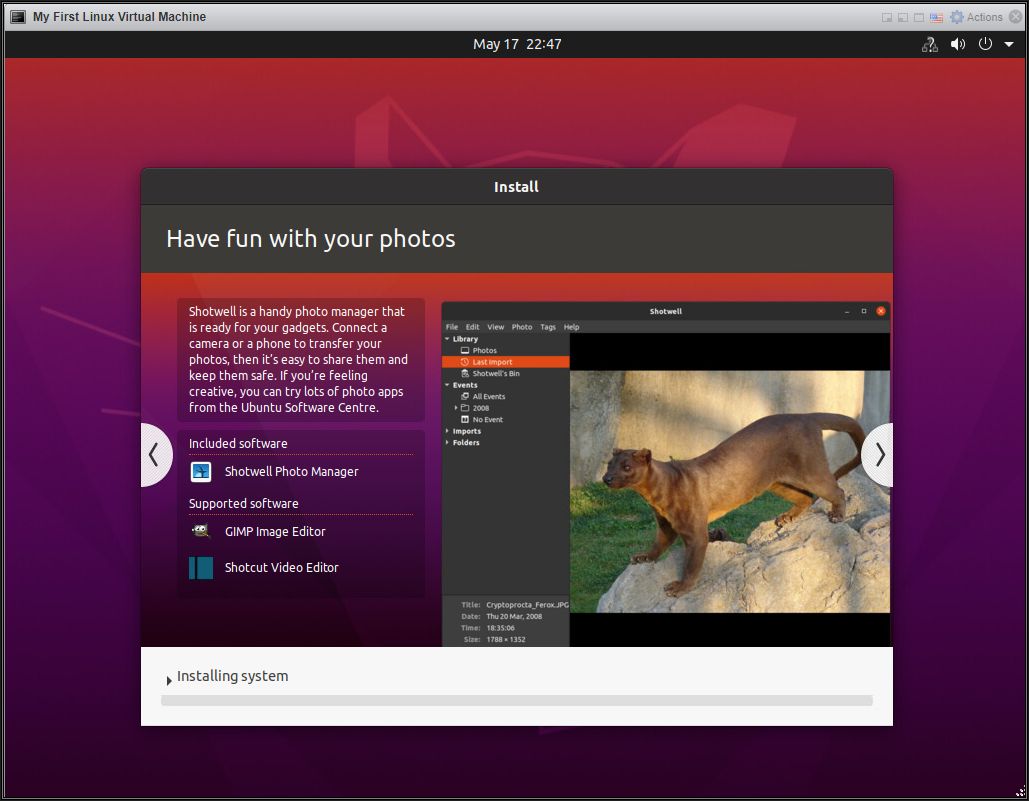
Wait for the installer to finish copying files.
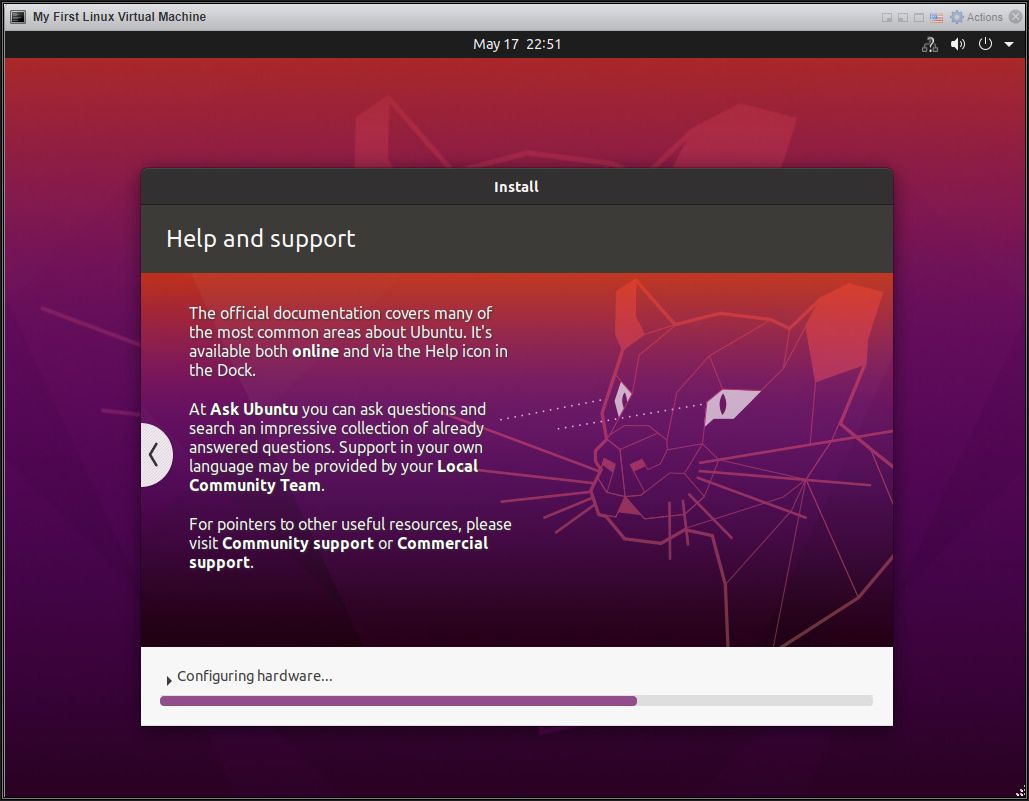
The hardware is now configured.
The boot loader is installed on the disk

Click Restart Now
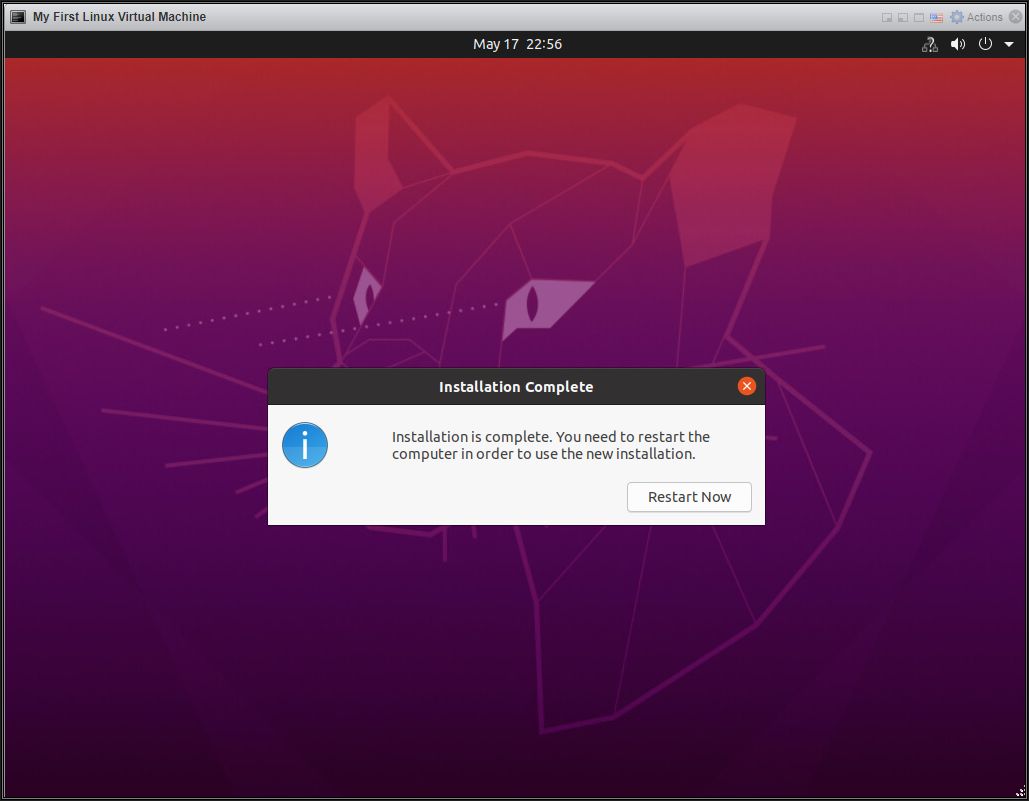
Disconnect the ISO from the virtual machine and hit enter.

After the installation restarts, The Ubuntu desktop login screen will appear.
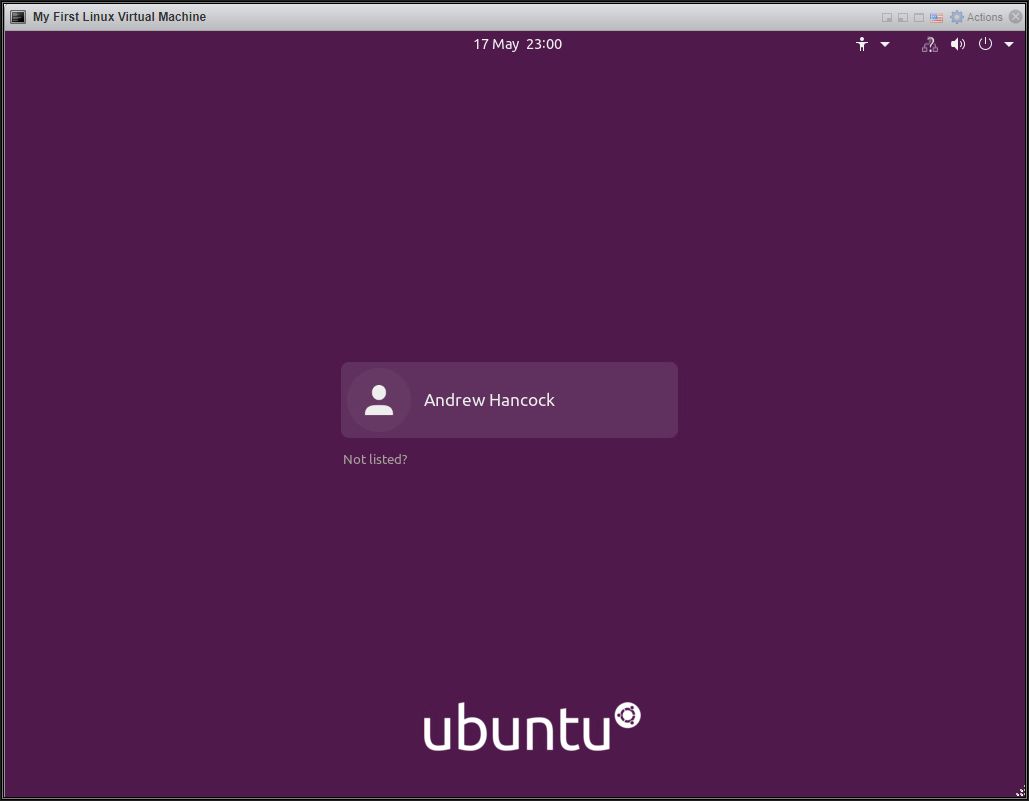
Press your Enter key and input your password.
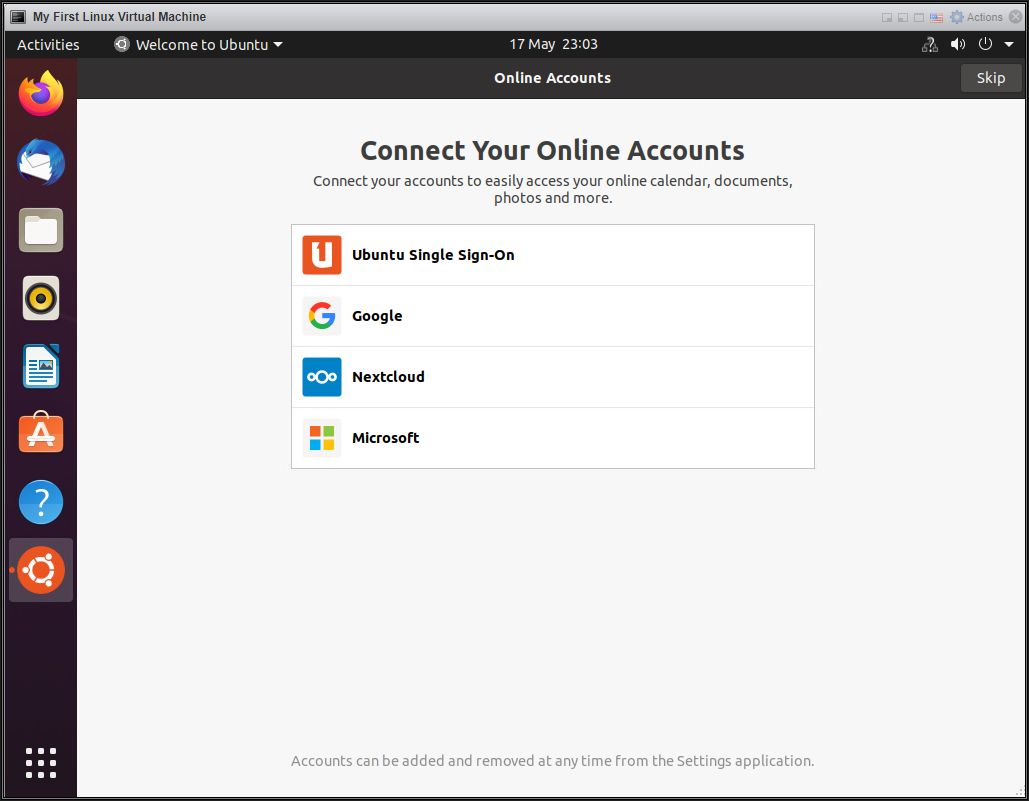
Congratulations, you have successfully created your first Linux Virtual Machine on a VMware vSphere Hypervisor 7.0 (ESXi 7.0) Host Server
It is recommended to install VMware Tools in the virtual machine. Please see my next articles in this series
Basic VMware Articles Series:
These articles are also applicable to VMware vSphere Hypervisor ESXi 5.0, 5.5, 6.0.
These articles are applicable to VMware vSphere Hypervisor 6.5.
These articles are applicable to VMware vSphere Hypervisor 6.7.
Previous articles in this VMware vSphere 7.0 series are here.
If you found this tutorial helpful, please do click the Thumbs-Up icon below. This lets me know what is valuable for EE members and provides direction for future articles. If you have a related question based on this article, please click here.
Thank you very much!
Regards, Andy
If you would like to read my Basic VMware articles, they are listed at the end of this article for your convenience.
In this series of basic VMware articles for the Novice, I'll be showing you the basic VMware skills required to install, configure and deploy virtual machines using VMware's FREE VMware vSphere Hypervisor (ESXi).
In this article we will show you HOW TO: Create your first Linux Virtual Machine on a VMware vSphere Hypervisor 7.0 (ESXi 7.0) Host Server using the VMware Host Client . This procedure can be followed to install ANY Linux distribution Virtual Machines on earlier versions of VMware vSphere provided they are supported by the version of VMware vSphere. You may want to consult the VMware Hardware Comparability Lists or HCL , see here .
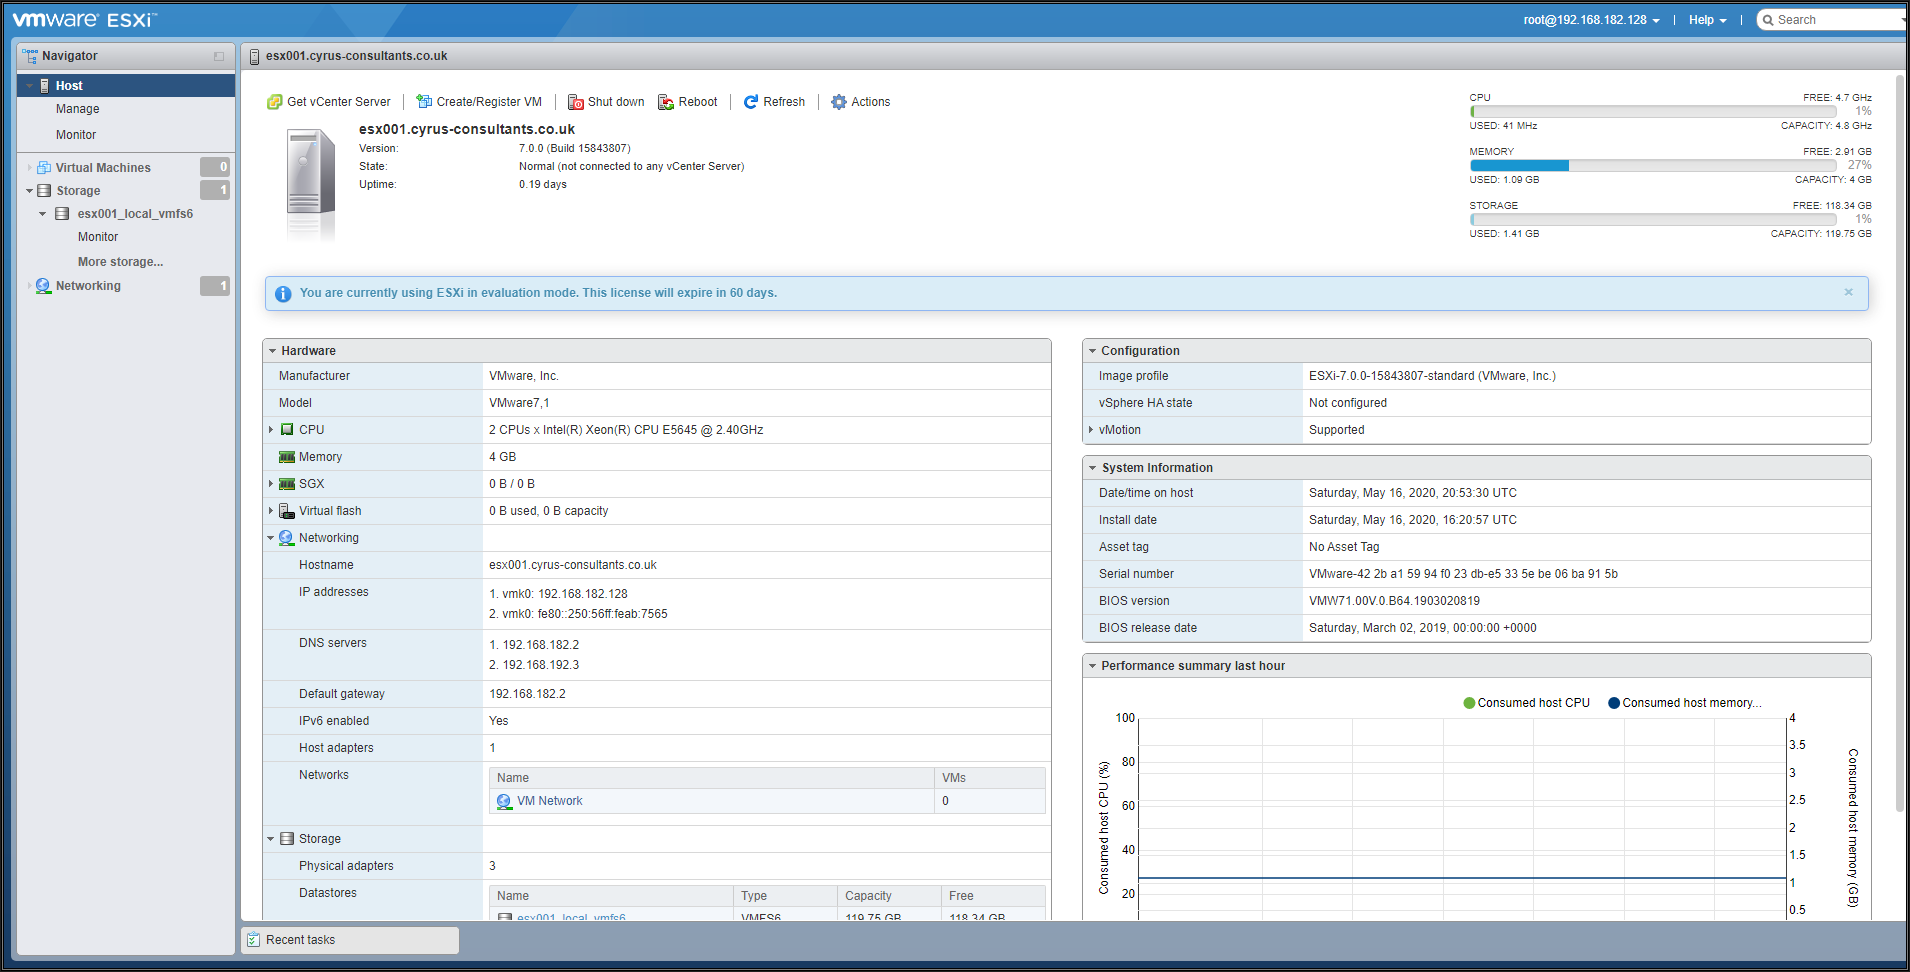
1. Connect to the VMware vSphere Hypervisor 7.0 (ESXi 7.0) or vSphere vCenter Server using the VMware Host or vSphere Web Client
Please refer to my previous article - HOW TO: Connect to the VMware vSphere Hypervisor 7.0 (ESXi 7.0) using the vSphere (HTML5 Web) Host Client 7.0
2. Upload the Windows operating system ISO image file to the VMFS datastore
Please refer to my EE article on Part 4: HOW TO: Upload and Check the MD5 signature of an ISO CD/DVD image to a VMware datastore using the VMware Host Client, for use with VMware vSphere Hypervisor 7.0 (ESXi 7.0).
If you have already downloaded a Linux distribution as an ISO image file from the internet there is no need to create an iso image file if you have physical CD-ROM or DVD-ROM Windows media; Please refer to my EE article on HOW TO: Create an ISO CD-ROM/DVD-ROM image (*.iso), and MD5 checksum signature, for use with VMware vSphere Hypervisor 7.0 (ESXi 7.0)
In this example, we will use Ubuntu 20.04 LTS Desktop edition, this can be uploaded to the datastore, esx001_local1_vmfs6, using the previous EE Article - HOW TO: Upload and Check the MD5 signature of an ISO CD/DVD image to a VMware datastore using the VMware Host Client, for use with VMware vSphere Hypervisor 7.0 (ESXi 7.0).
Please note and check the VMware Hardware Comparability Lists (HCL) here , to check your Operating System is compatible with VMware vSphere. Many operating systems fail to install because the operating system is not supported by the version of VMware vSphere being used. In the following screenshot from the HCL , we can clearly see this is supported for the version of VMware vSphere 7.0 we are using in this tutorial.
3. Creating the Linux Virtual Machine
Right Click Virtual Machine and select Create/Register VM. This will open up a wizard and guide you through the process of creating the virtual machine configuration.
After selecting Create New Virtual Machine, the Create New Virtual Machine dialogue box and wizard will be displayed. This allows you to specify your requirements for the virtual machine, the number of processors, the amount of memory, storage required, and network card, these are the basic requirements, which are needed to create a virtual machine.
Take a few minutes to think about your virtual machine requirements, Ask yourself the question - What would you specify when purchasing a physical machine or server? These values can be changed and amended later, e.g. add additional processors, increase memory or storage space. It's much easier to grow storage than reduce it later, so my advice would be to start small, and later grow your resources, by looking at the performance of the virtual machine.
In a previous EE Article, we discuss performance, see here - HOW TO: Performance Monitor vSphere 4.x or 5.0 . One of the many advantages of virtual machines, we have greater flexibility to add and remove resources, compared to a physical computer or server. We also have very fine controls, or granular controls over machine specifications, e.g. memory, most memory components in physical servers today are in 4GB DIMM increments, using virtualization, we can increase memory in 256MB or 512MB increments! This is not easy to complete with physical computers, we cannot cut a memory DIMM in half!
The Create Virtual Machine Wizard creates the configuration or machine specification for us to install our operating system later. It includes some specification templates, based on the vendors minimum requirements for the Operating System selected.
Select Create a new virtual machine followed by next.
Enter a Name for the virtual machine and click Next.
This is the name which will appear in the inventory, this is not to be confused with the operating system's hostname, which will be set when we install the operating system. In the example, I have entered the name " My First Linux Virtual Machine ". This is not a good example, and I would not recommend the use of spaces for production servers, use hyphens or underscores!
Select the Guest OS Family, and Guest OS version. Leave the Compatibility set to ESXi 7.0 virtual machine.
Click Next to continue, select the datastore to store the virtual machine configuration files and virtual machine disks and click Next to continue through the wizard
In my previous EE articles, we discussed datastore creation see here
Part 1: HOW TO: Install and Configure VMware vSphere Hypervisor 7.0 (ESXi 7.0)
Part 2: HOW TO: Connect to the VMware vSphere Hypervisor 7.0 (ESXi 7.0) using the vSphere (HTML5 Web) Host Client 7.0
Select the storage datastore to use to store the virtual machine, followed by Next.
Customize Settings - Configure the virtual machine hardware and virtual machine additional options, and click Next to continue. Make sure you select the Datastore iso, you have already uploaded.
Select the required virtual disk size, this is the size of the disk for the operating system installation. The default size is provided based on vendors minimum recommendations.
Please note: I t's very easy to increase the disk size of a virtual machine after installation, please see my previous EE Article - HOW TO: Resize a VMware (VMDK) Virtual Disk , However, it's more difficult to shrink a virtual disk. So we would always recommend, starting small and growing later. The only VMware supported procedure to shrink a virtual disk, is to use VMware vCenter Converter Standalone, and create a V2V, which is also covered in my previous EE Articles listed here
HOW TO: Shrink or Reduce a VMware Virtual Machine Disk (VMDK) using VMware vCenter Converter Standalone v5.5.2 (same procedure for 6.2.0.1).
HOW TO: P2V, V2V for FREE - VMware vCenter Converter Standalone 6.2.0.1
Click Finish to create the virtual machine configuration.
The virtual machine will be created. If you check the Host Inventory, you will see your Virtual Machine - "My First Linux Virtual Machine" listed in the inventory. If you have been following this series, you may also see the virtual machine we created in this article - Part 7: HOW TO: Create your first Windows Virtual Machine on a VMware vSphere Hypervisor 7.0 (ESXi 7.0) Host Server
4. Installing Ubuntu 20.04 LTS Desktop Edition in the Virtual Machine
Installing Ubuntu 20.04 LTS Desktop Edition in the Virtual Machine hosted on the VMware vSphere Hypervisor 7.0 (ESXi 7.0) Host Server is very similar, to installing the Ubuntu 20.04 LTS Desktop Edition on a physical computer or server, with a few differences, which we will list below.
The very first time a virtual machines boots, its' BOOT order in the CMOS BIOS is set to CD-ROM. After the installation has been successful, this is reset to Hard Disk.
Right-click the virtual machine "My First Linux Virtual Machine" and select Power On. The virtual machine should automatically boot from the CD-ROM ISO image file. Then select the Console function so you can interact with the virtual machine.
The virtual machine should automatically boot from the CD-ROM/DVD-ROM ISO image file. The Console function is similar to the Keyboard/Video Machine (KVM) function in a datacentre, which allows you to toggle between console screens of computers, it allows you to interact with the virtual machine, with keyboard and mouse movements, and displays the screen. The Ubuntu installation start-up process.
Hit Enter to Continue.
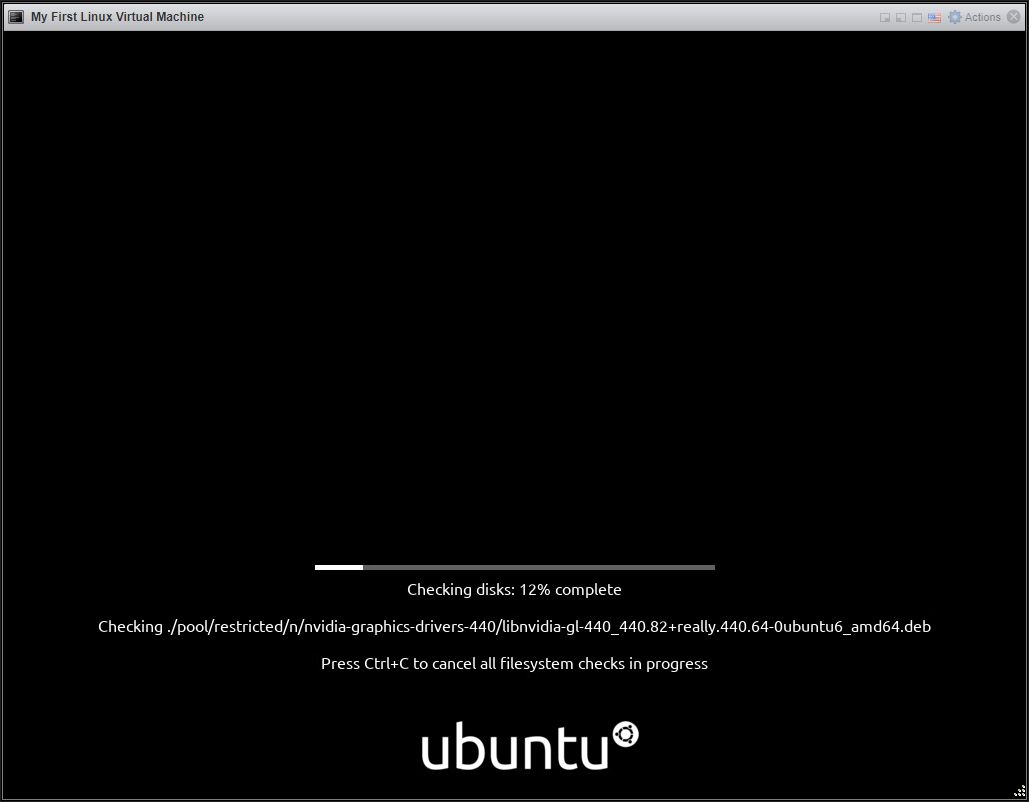
The installer will verify the installation media and check for errors and corruption before continuing.
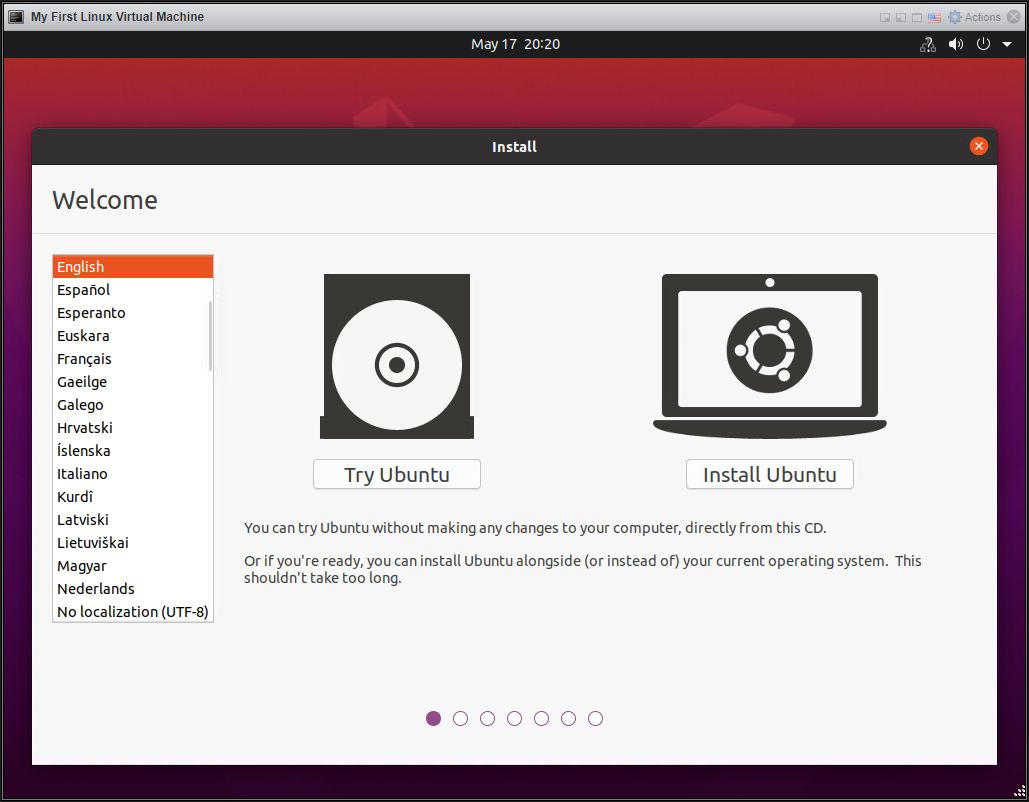
Select your Language
Click Install Ubuntu
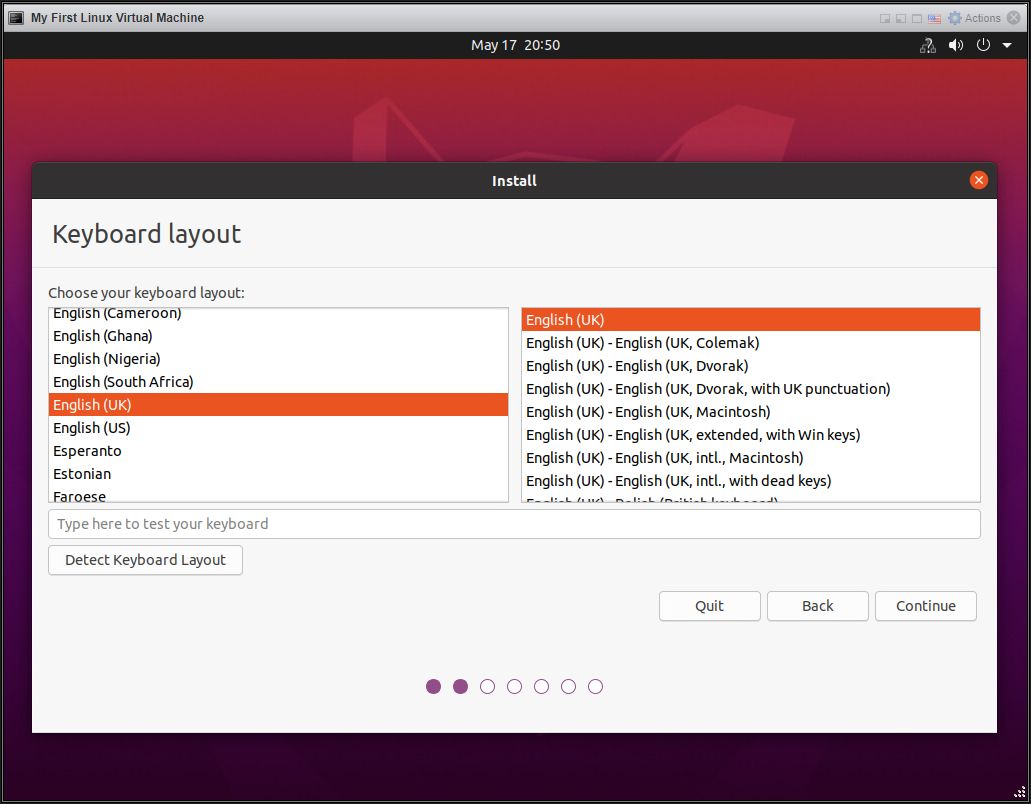
The following screen will be displayed - select your keyboard layout and select continue
Select Normal installation and click continue
Select Erase disk and install Ubuntu, and click Install Now
Select continue to confirm the partition changes to the disk.
Select your time zone and click continue.
Enter your name, computer name, account name and password, and click continue.
Wait for the installer to finish copying files.
The hardware is now configured.
The boot loader is installed on the disk
Click Restart Now
Disconnect the ISO from the virtual machine and hit enter.
After the installation restarts, The Ubuntu desktop login screen will appear.
Press your Enter key and input your password.
Congratulations, you have successfully created your first Linux Virtual Machine on a VMware vSphere Hypervisor 7.0 (ESXi 7.0) Host Server
It is recommended to install VMware Tools in the virtual machine. Please see my next articles in this series
Basic VMware Articles Series:
These articles are also applicable to VMware vSphere Hypervisor ESXi 5.0, 5.5, 6.0.
These articles are applicable to VMware vSphere Hypervisor 6.5.
These articles are applicable to VMware vSphere Hypervisor 6.7.
Previous articles in this VMware vSphere 7.0 series are here.
- Part 7: HOW TO: Create your first Windows Virtual Machine on a VMware vSphere Hypervisor 7.0 (ESXi 7.0) Host Server
If you found this tutorial helpful, please do click the Thumbs-Up icon below. This lets me know what is valuable for EE members and provides direction for future articles. If you have a related question based on this article, please click here.
Thank you very much!
Regards, Andy
EE Fellow, MVE, Expert of the Year 2021,2017-11, Scribe 2016-2012, Author of the Year 2018-6,2013-2012 VMware vExpert Pro, vExpert 2022-2011
Have a question about something in this article? You can receive help directly from the article author. Sign up for a free trial to get started.
Comments (0)